Simplicity

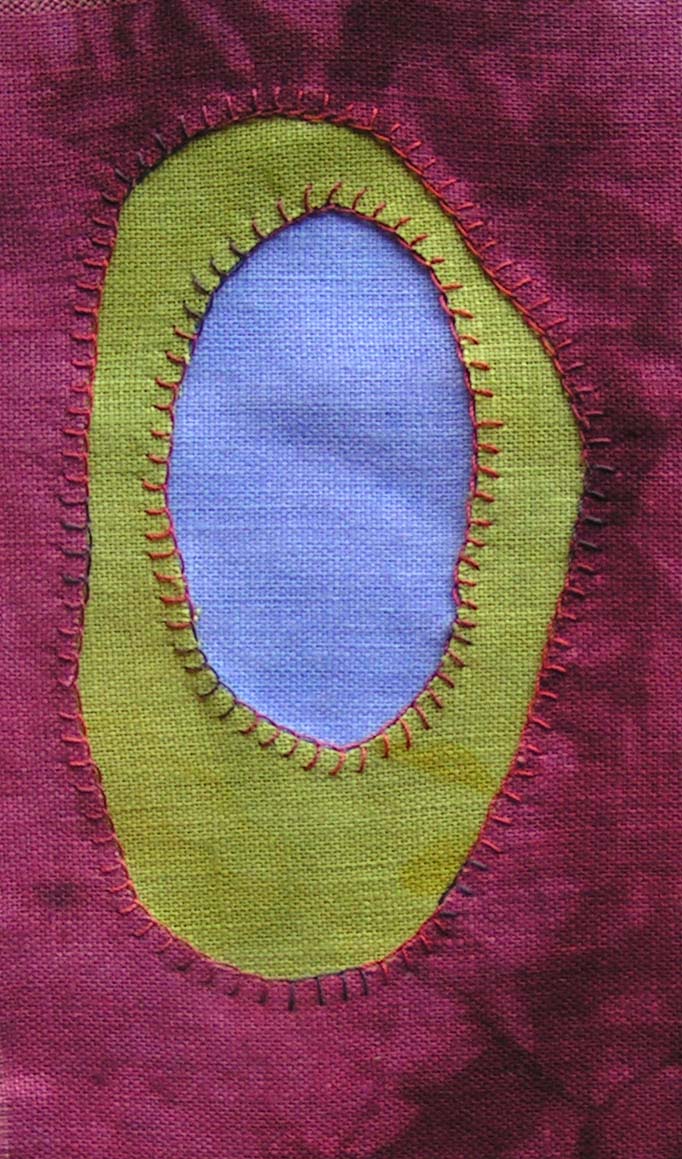
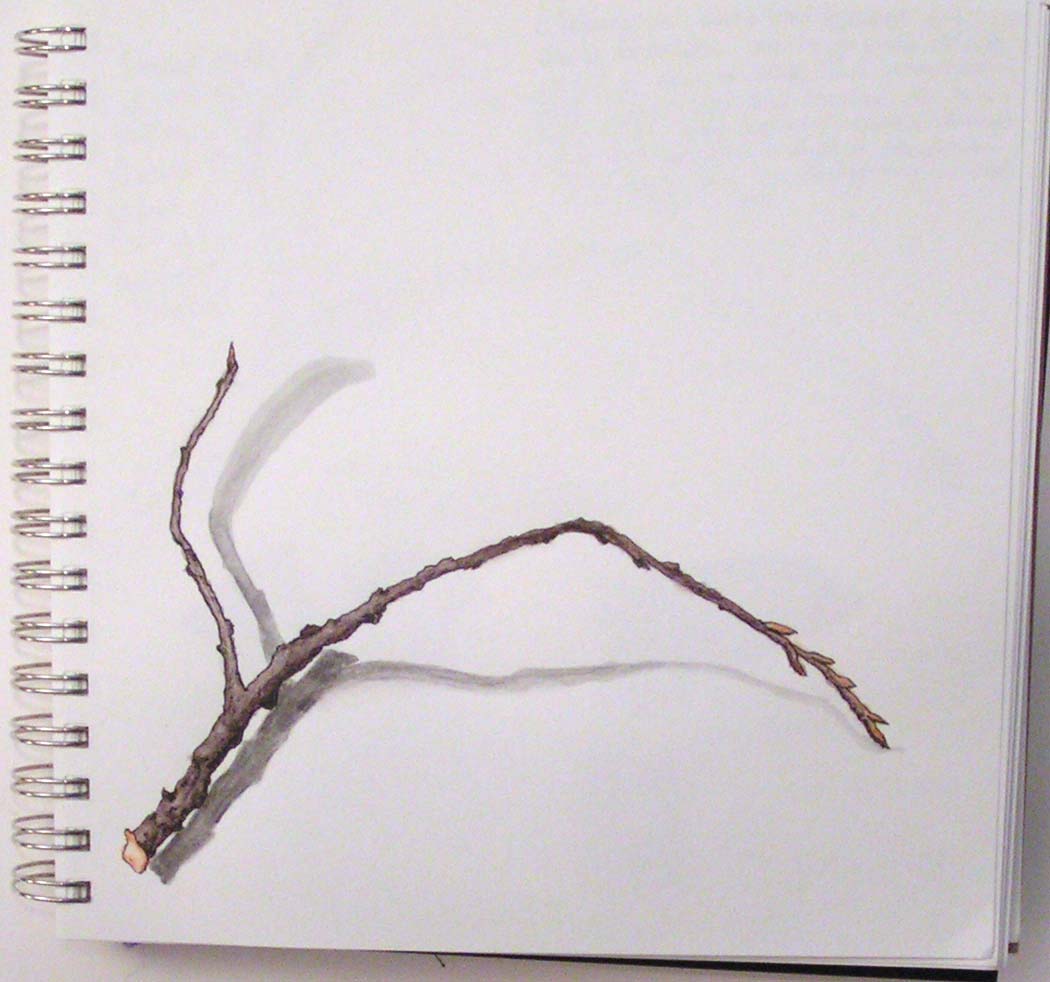
I love simplicity in design. It’s not easy to achieve but I always admire when a piece is taken back to the bare essence of an idea. So when Textileartist.org announced a challenge by Emily Jo Gibbs, I was intrigued with her style. The instructions were to find a stick or an object such as a paintbrush to be your inspiration. Then, sketch the item and use that sketch to create an applique. Ha! Applique is perfect for another homework assignment. Plus, the simplicity of using a sketch as the design. I have hundreds of sketches that I could use. But I found a stick, and did a sketch of it, including the shadow.

Then I created a pattern for the applique pieces out of tracing paper, chose some hand dyed organza and a linen background.

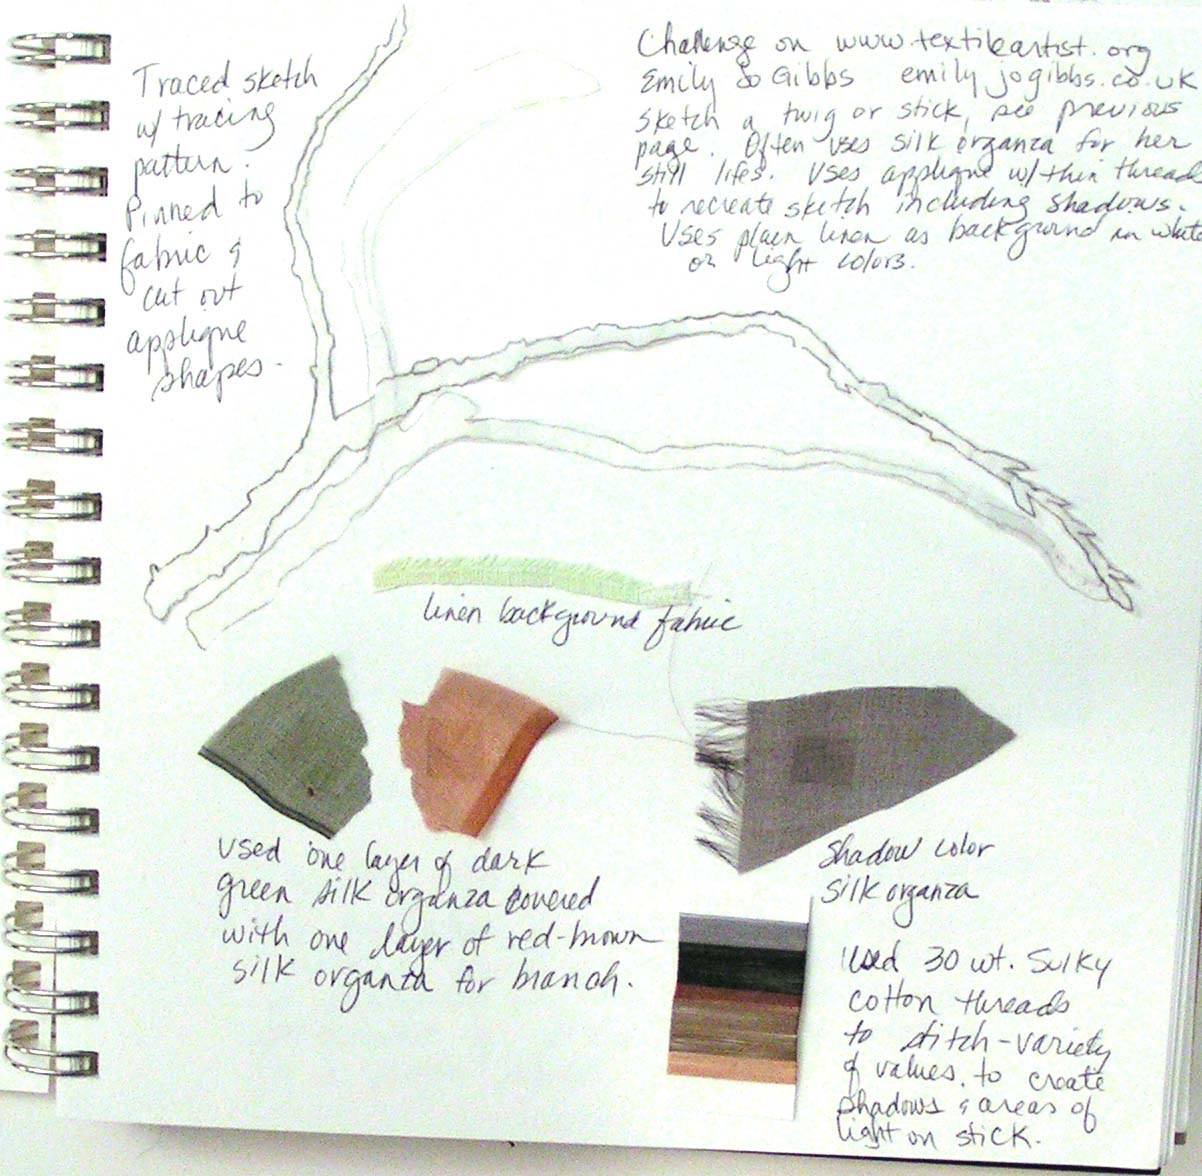
Here’s the documentation in my sketchbook for Level 3 Stitch class.

Then on to hand stitching while listening to a portion of an online class given by MOMA. I love the simplicity of the piece. A bare bones sketch in applique. As I said, I have loads of sketches that I could recreate this way.

For the MOMA class, the artist featured this week was Barnett Newman. I had never heard of him before and it was interesting to learn about his style. Again, simplicity is evident. His work that he is best known for are his “zips”, the line of yellow oxide down the middle of the painting in a solid colored background. But the “zips” weren’t usually exact and had more complexity to them as you get closer and view the painting at more length. Many of his paintings are really large so that as you get closer, you are engulfed by color. The painting above is done in his style. Acrylic paint on sketchbook paper. I don’t think it quite gives the same impact as it might have on canvas or board. But it was an interesting experiment.

It’s a fun course and now we are studying Willem de Kooning.

Thanks for stopping by and stay safe!


Portrait Applique

I have been working on this applique piece for over a month. At our art meeting in February, we all worked on portraits. Some of us created portraits with paper collage but I decided to use fabric. That way, the portrait would work for my stitch homework. Having never done a stitched portrait, I learned a lot and found it fun, up until doing the facial features. Then I got a little stressed. I didn’t take very many in process photos.

These were the samples that I did in advance for facial features. I ended up doing an eye that was more like the one on the right. The teeth ended up being put directly on the lips fabric instead of having two layers of fabric with the dark for the inner mouth. That just didn’t work. And noses are hard.

Here she is partially stitched. I used a photo I found online when I searched for celebrities with wild, curly hair. The reason I did this portrait was so I could stitch wild, curly hair. That was my favorite part. None of the fabric was fused down, mistake number one. But it ended up working OK. The mouth ended up tilted too much and I really didn’t like it. So I did some surgery and cut it out and stitched it back down. This would have worked except for fabric fraying. I ended up adding some glue at the edges to keep it in place.

And here’s the finished portrait. I fussed with the nose and the mouth for an inordinate amount of time. They still aren’t the way I had in mind exactly but they’re OK. And it was fun trying something new. If I do this again, I will fuse all the fabric. Maybe I should try one with fused fabric and free motion machine stitching? That might be fun too.

I hope that all of you are staying safe and well in this crazy world. I’m staying at home and I’m finally out of the retail business, so more stitching, felting and fiber art to come! Yay!

Applique Samples

I have been working on a list of types of applique for class. I took some photos of samples from past classes and made a new one. It’s good to look back and see which ones I have already sampled and look for other types that I haven’t tried yet. All except the last sample were made in my Level 2 Stitch class.

These two are Broderie Perse. I have not stitched the one on the right because the flower fabric frayed and fell apart every time I tried to stitch it. So I just ended up fusing it down.

These two are shadow applique. The one on the left is felt and silk organza. The one on the right is cotton and silk organza.

These two are turned applique. The one on the left uses a fusible and the one on the right is a needle turned applique. These are probably two of my least favorite types of applique.

Here’s a stacked felt sample. These are fun because you don’t have to worry about the edges of the felt fraying.

This is a machine stitched cut back applique.

This is the sample I stitched this week. It is reverse applique. It’s created with three pieces of hand dyed linen and blanket stitch. It is a raw edge applique but actually the blanket stitch keeps the linen from fraying as much. I still have at least one more sample that I’m going to create and another larger piece that will be based on bark. So more applique to come.

Cone Flowers Applique

I have been busily working on my Level 3 Stitch homework. Each morning for the last couple of weeks, I have been working on my machine stitched applique piece. I based it on one of my paintings that I completed in Level 3 Art and Design.

Here’s the original painting. It was done with a mix of techniques and I thought it would make an interesting applique. I wanted to make the surface very textural to mimic the “texture” in the paint.

I finished it today. I stitched the tree trunk and the cone flowers today. I had a really good time with the background and used loads of loose threads, torn up burlap and cheese cloth in a variety of colors. The cone flowers were especially fun to stitch and I love the texture. So now it’s hard to decide whether I like the original better or the fabric applique piece. What do you think?

Stump Rings Applique Completed

I finished stitching the stump rings piece that I showed the design work last week. It seems a little busy to me but I am leaving it alone for now. I really like how the colors shift into the next and the overall look from a distance. I just don’t care for it up close.

Here it is with cropping. Somehow I ended up with the center of the spirals too close to the center of the piece. The camera has a hard time capturing the sheer fabric and the shift in colors.

Now on to my machine stitch applique piece.