Another Stencil

I’m still working on my next online class and one of the aspects of that class is making stencils. I decided to do a more complex stencil and cut it out with a heat tool. So I used my sketch of a pine cone and developed the stencil from that sketch.

sketchbook pine cone cropped

Here’s the original sketch. I was originally going to try to cut all the pine cone shapes but I decided it would be better with just the outside lines. It would look more like a sketch.

Pine Cone Stencil

The stencil is to the left and then two sketchbook pages that I printed are on the right. I didn’t take a lot of time printing these thus getting ink and paint under the stencil since I was in a hurry. But I think that the pine cone still looks like a pine cone and the “blobby” bits just add more dimension to the stencil. Haven’t tried printing on felt yet with this one, that’s the next step. Have a great weekend.

Trying a Photo Transfer on a Gelli Plate Print

I saw a video about doing photo transfers on to previously printed colored paper from the Gelli plate prints. So I thought I would give it a try. The video showed transferring photos of people’s faces but I decided to try a photo of branches against a winter sky. I did have to fiddle around with the photo to get it more black and white and then I printed it on regular computer paper. I then put matte medium on the photo and on to the printed gelli print. After messing around with getting rid of the extra computer paper with water and rubbing, I finally got it to work. Here’s the card I made.

Gelli Print Card with Photo Transfer

I really like the photo so I think I will try making a few more of these. Hopefully, the process will get better with a little practice. Have a good weekend!

Nuno Felting

My local group met for the last time before our summer break. We did nuno felting. Sally and Louise made scarves, Paula finished up a piece she was already working on and I made some samples.

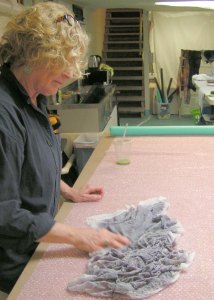
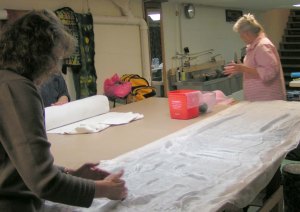
This is Sally making her scarf. She used a cotton cheesecloth/scrim type material and merino mixed with silk. She had never nuno felted before but did a great job.

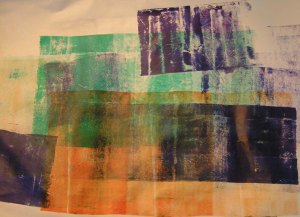
These are some pieces that Paula had made previously. I didn’t get a photo of the piece she finished today. Hopefully, she will frame it and I can get a photo of it framed.

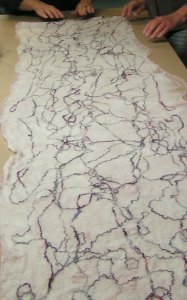
And here is Louise’s project. She used butterfly silk, cotton threads and a mix of poodle hair and merino. It took a bit of extra effort to get the poodle hair to felt but it worked in the end. It did smell a bit like a wet dog though.

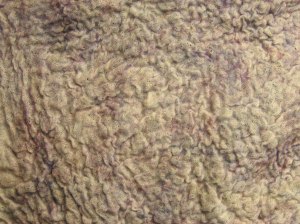
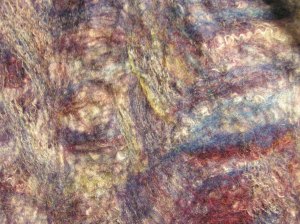
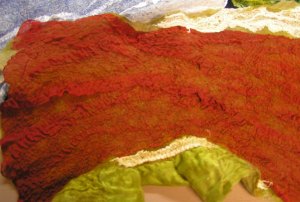
Here are a few samples that I made. The pink one has a layer of viscose fiber in the middle. I think that I added too much wool because I thought it would be a bit more light weight than it is. The second one is a weaving of two silk fabrics that I then nuno felted. The red and green fabric is from the pillows I recently made. It is silk charmeuse and very heavy. I didn’t think it would felt but Zed suggested I try weaving it in with a lighter weight silk that would hold the heavier fabric down. And it worked. The colors aren’t too exciting together but I was just testing out how the silk would hold down. I also tried sandwiching the heavy silk fabric between layers of wool to see if I could still see an outline of the silk in the middle. That one didn’t work. It just looks like felt. You can feel the silk as the felt kind of slides around on it but otherwise very unremarkable. But we all had fun so that’s the most important part.

Layered Paper and New Stencil

I saw a video on Facebook this week using layering of stencils by Mary Beth Shaw of Stencil Girl. I decided to try the process out today. I already had some papers that could be used for backgrounds. I don’t have very many stencils that are just patterns though. So I had to  make do with what I had.

The photo on the left is where I started and the photo on the right is finished. I used my stencil that is based on bark but actually always looks more like an animal print. It’s an easy technique. You just keep using the same stencil and different paint colors. You keep moving the stencil into different positions and layering paint.

The next one used a painted sketchbook page and then using a commercial flower stencil. I didn’t do as much layering on this one. It’s an interesting technique that I think makes some great paper for collage and art journal pages.

Wild Geranium Inspiration Photo

This is a wild geranium that grew in my flower bed. I decided to use this photo to create a stencil.

On the left, I added it to one of my already painted backgrounds. You can see the stencil on the right side of that photo. The photo on the right shows the stencil using ink from stamp pads on to scrap paper, very wrinkled scrap paper. Still working on my online stencil and print class if you couldn’t tell 🙂