Finishing Off

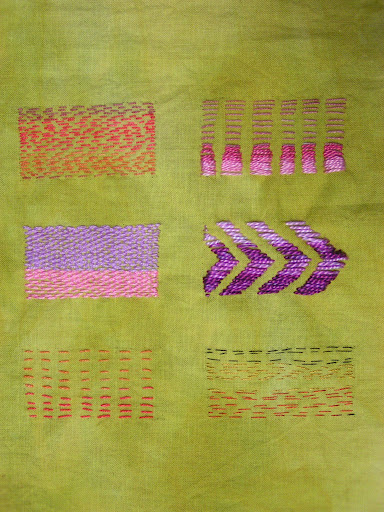
I have been going through my stash of items that I have made but haven’t completely finished or that just need labels. I am getting them ready to sell at my store. (By the way, we have a brand new website, if you’d like to check it out http://purplepomegranate.com/) I also have a few projects that need some hand stitching and I started on one of those.

 This one is called Avalanche Creek and is made with lots of different fibers. It has been wet felted and needle felted. The inspiration was from a photo I took in Glacier National Park. It was made for an example in my book, The Complete Photo Guide to Felting.

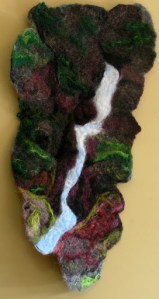
This piece is called Roots. It was made entirely on my Janome needle felting machine. It was also made for the book but sadly, none of the fifteen projects I developed for the book were included. I guess I’m too long winded. I had hopes that they would publish the projects separately but I haven’t heard anything from the publishing company about it. Roots also has a variety of fibers, yarn and fabric.

 Here’s a couple of closer views.

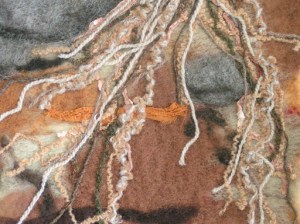
This was fun to make, I really enjoyed adding all those yarns on top.

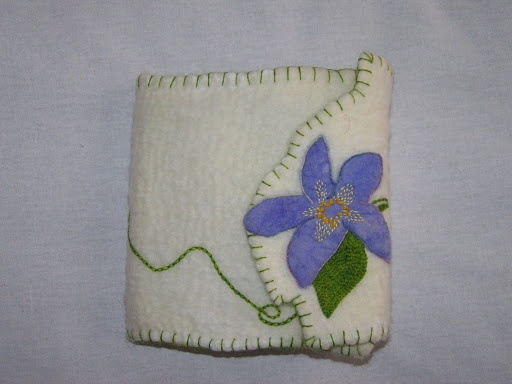
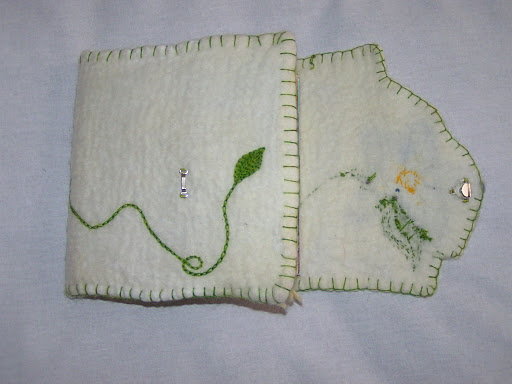
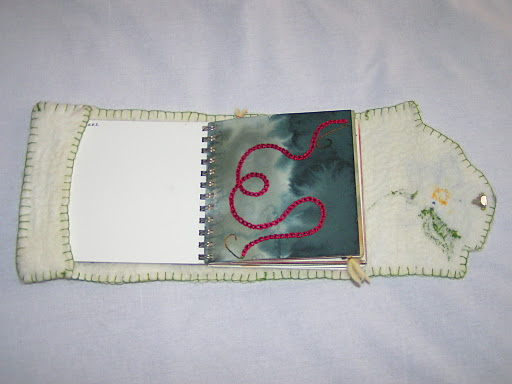
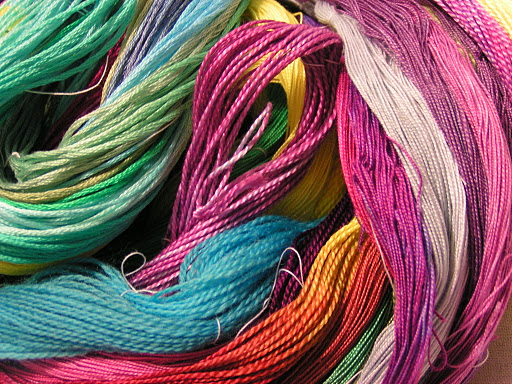
 Here’s the hand stitching project. It is a nuno felted book cover. The threads are the colors I am going to use. I thought it needed a little brightening up.

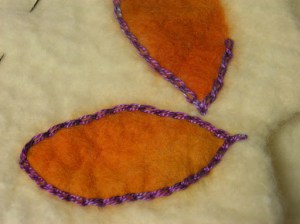
Here’s a closer view. Chain stitch around the prefelt orange pieces. I think this is going to be a kind of paisley design. I have lots more stitching to do on this as I’m going to cover lots of the white.

Busy, busy, busy

 I have been a busy, busy girl. First we made a trip to Washington DC and on to Philadelphia for the Buyers Market of American Craft to buy for the store. I wrote a post about it over on the Felting and Fiber Studio site. We got home from Philly and then two days later drove over to La Conner, Washington to go to my stitch course with Gail Harker. When we got back after a week, I had my local surface design group at the house, a Brewfest fundraiser on Big Mountain and now we have company coming to visit. Never a dull moment. The photo above is a sari from the collection of Penny Peters who has traveled to India several times. She assists with our stitch class and since we were studying Kantha embroidery during the session, she showed us some wonderful examples. These are all done with running stitch. Who knew that the lowly running stitch could form so many patterns?

 This pattern really caught my eye. I love the geometric look of the center section. We studied the stitch, working in our sketchbooks. I’ll have to show sketchbook photos later.

 This one was really cool as well. The filling in the elephants and birds is done with all running stitch. This is another sari in Penny’s collection.

We then stitched samples of a variety of patterns using running stitch. It’s amazing how long this takes. For these 6 small samples which are each about 1″ x 2″, it took me 4-5 hours to stitch. This one was done on only one layer of muslin as Kantha stitching is usually done on very thin layers. I have more examples to show you but they aren’t quite finished yet. Plus I have two Kantha projects to work on before our next session in May. We got loads of homework!

 For those of you who were asking about my Round Robin piece, I finally got it back. This isn’t a very good photo of it. I’ll have to get a better one. Louise added a variety of paper and paint and Bunny added copper metallic mesh and beads. It really turned out to be a beautiful piece.

For our play session at my house, we did paper mache, mainly because Carole had never done it before. I made little bitty cups of paper thinking I would use them for light covers on a string of Christmas type lights. However, as you can see from the photo, I only managed to complete four of them. As that would make for a very short string of lights, I’m not sure what I’m going to do with them.

I have finally gotten the book pages from the publisher to review. I’m sending those back soon and the book is still going to be out in August. I have another hat felting class scheduled at Camas Creek Yarn on March 23rd. I hope to get an advanced hat class worked out for some time this summer and perhaps a nuno felted jacket class. And then there’s the yurt. I think that I will only be able to get the designing portion of the yurt done this year. I had hoped to be able to start felting it this summer but with everything else on my plate, I don’t think I want to rush it. I am trying to stay focused as per my word for the year and I think I need to keep my focus on my stitch class. So yurt making will definitely be a two year project!

Don’t miss my upcoming post as it will be a celebration of my 400th post and I’ll be having a giveaway.

Nuno Felted Book Cover

 This is a book cover that I made last summer but never finished. It was a practice piece for another project and it just happened to fit my paper stitch book perfectly. The purple portion of the flower is felted to the cover and was a pre-felt. The cover was made with merino and cotton ‘harem’ cloth. The cloth was covered on both sides with wool and a resist was used to make the pocket that the front cover of the book slides into.

 I added hand stitching, mainly button hole and chain stitch. But there are also a few straight stitches and some french knots. The leaves are done with chain stitch used as a filling stitch. It’s still pretty plain and I may add other flowers and leaves at a later date but right now I’m happy with it.

 I added a hook and eye type closure, the kind that is made to go on trousers.

Here’s the inside showing the first page of my stitch book. It’s a little wonky in places but it helps to keep the book closed as it tends to bulge open a bit with all the stitching on the pages.

Cottage Garden

 This is a photo of a needle point piece that my mother made in 1988. It hangs with a companion piece made by my father over our bed. I have always loved this look into a cottage garden. I needed to do another distorted cross stitch piece for my home work for Level II stitch class so I chose this needle point piece as my inspiration. The original needle point is 11″ x 15″ and the cross stitch piece was to be 3″ x 3.75″ so I decided to make the garden a bit simper and leave out all the buildings.

 Here is what I started with as a background. I fused these pieces down to the background.

Here’s the end result. I used distorted cross stitch throughout except on the wall and the cobblestone path. I used straight stitch for those. I didn’t like the color of the wall after I got finished so I darkened it up a bit with Inktense pencils. I’m pleased with the results and actually liked doing this one better than the first because I had an inspiration to follow. Does it look like a garden to you?

Friday’s Dyeing Session

 For my stitch class, I needed to do a dyeing session at home. I usually only use acid dyes since I mainly dye wool and silk. For the assignment I needed to use Procion MX Dyes. So I mixed up a set of dyes and here I am about to start. You can see my color notebook on the left where I was working out different color combinations.

 I dyed a bunch more cotton threads and here they are all rolled up in plastic batching. I did try dyeing some wool thread and using vinegar to soak instead of the soda ash. Ann (Shepherdess) had suggested it. I’ve tried the wool thread with Procion MX before but soaked in soda ash and they don’t turn out very well. But this worked, they aren’t quite as bright as they would be with acid dyes but they still have a lot of color left. Before, I always ended up with very pale colors.

 Here are some of the fabrics that I painted. These will be used for our stitch samples. I dyed linen, muslin, cheesecloth, commercial felt, silk organza, burlap and cotton organdy.

 Here are the threads after rinsing and drying.  I wanted more purples and greens to round out my colors of thread that I now have.

Don’t you just love the colors? The turquoise one at the bottom left is the wool thread. Now I just need to iron all the fabric and wind all the thread into balls.