Putting Off Tasks

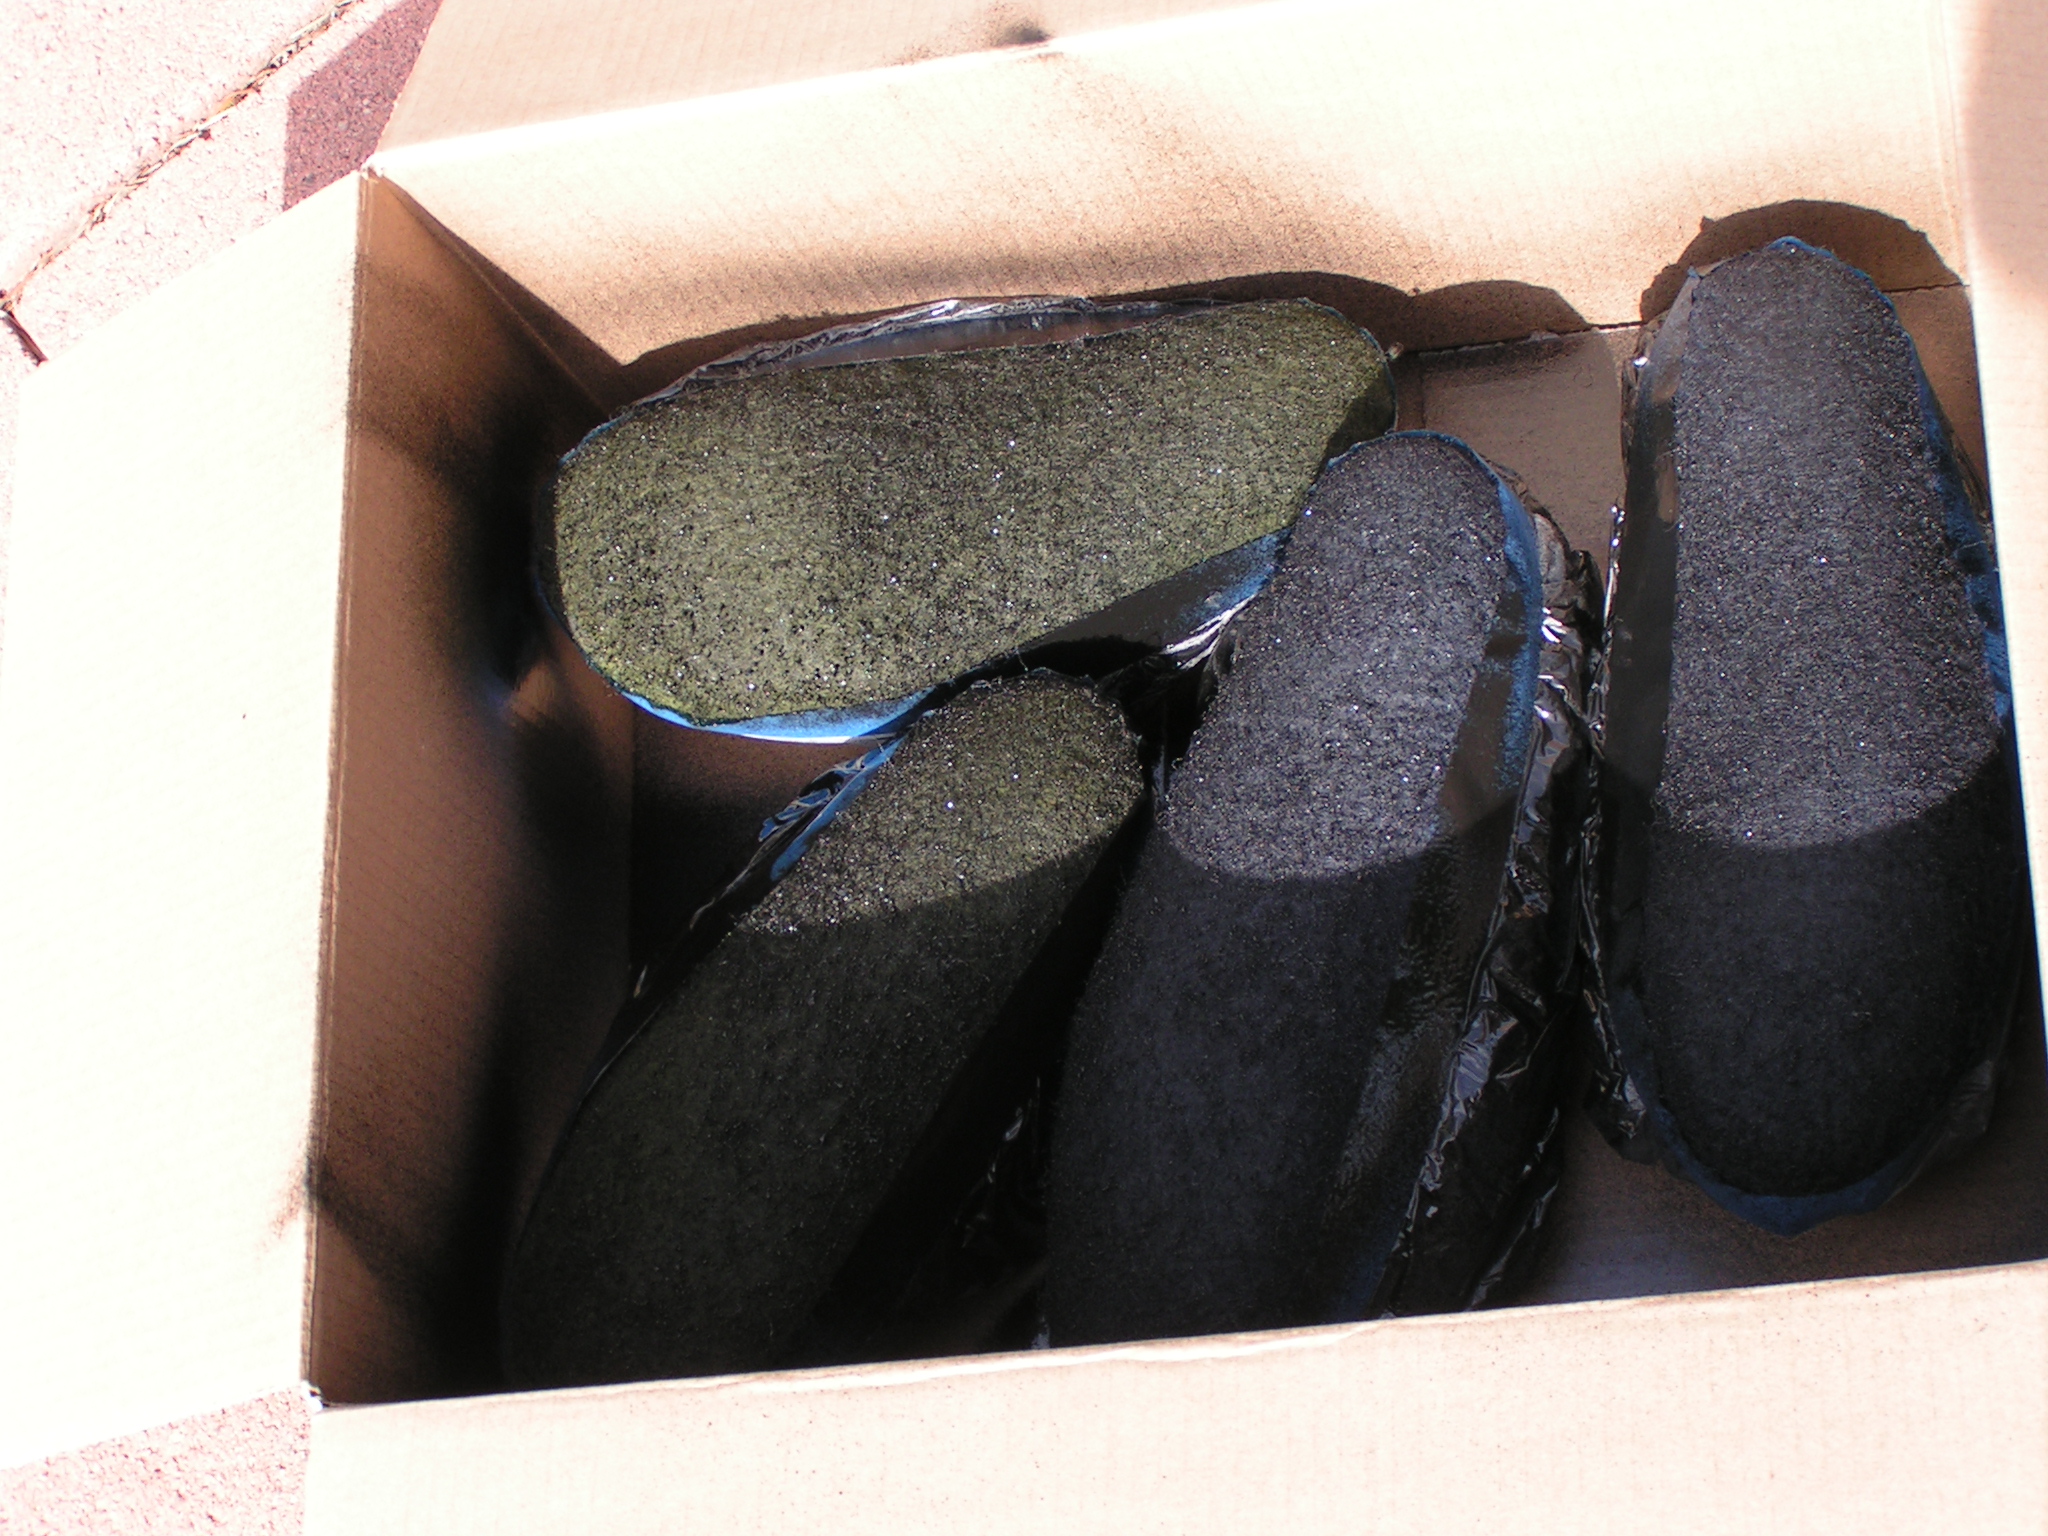
Today I did a lot of tasks that I had been putting off for a while. First, I sprayed the soles of the slippers that I made for my husband and I. This task had to be put off because it was too cold to spray before this. It was a warm, sunny day, so I took them outside. So far, I’ve done 5 coats. I think I’ll do a few more until the can runs out.

Spraying Slipper Soles

I did a little felting after that but I’ll show you that next week on the Felting and Fiber Studio blog. When I bought my Pfaff sewing machine in June 2012, I was told that I could get a free cleaning and tune up if I brought the machine in before two years was up. So I decided I should get that taken care of and also learn how to use the embroidery unit on the machine. I was offered three free classes to learn how to use the machine which I never used. So, since I was already taking the machine in, I decided I should take a class as well.

Digital Embroidery

Here’s the embroidery piece that I did during the “class”. Essentially, the woman just showed me the basics of how the embroidery unit works. I’m not sure I will use it much but I thought I should at least know the basics. The patterns aren’t exactly what I would normally use and it costs $2,200.00 to buy the software package that allows you to develop your own designs. So I guess if I do use it, I’ll be using what came with the machine.

Felt and Stitched Landscape

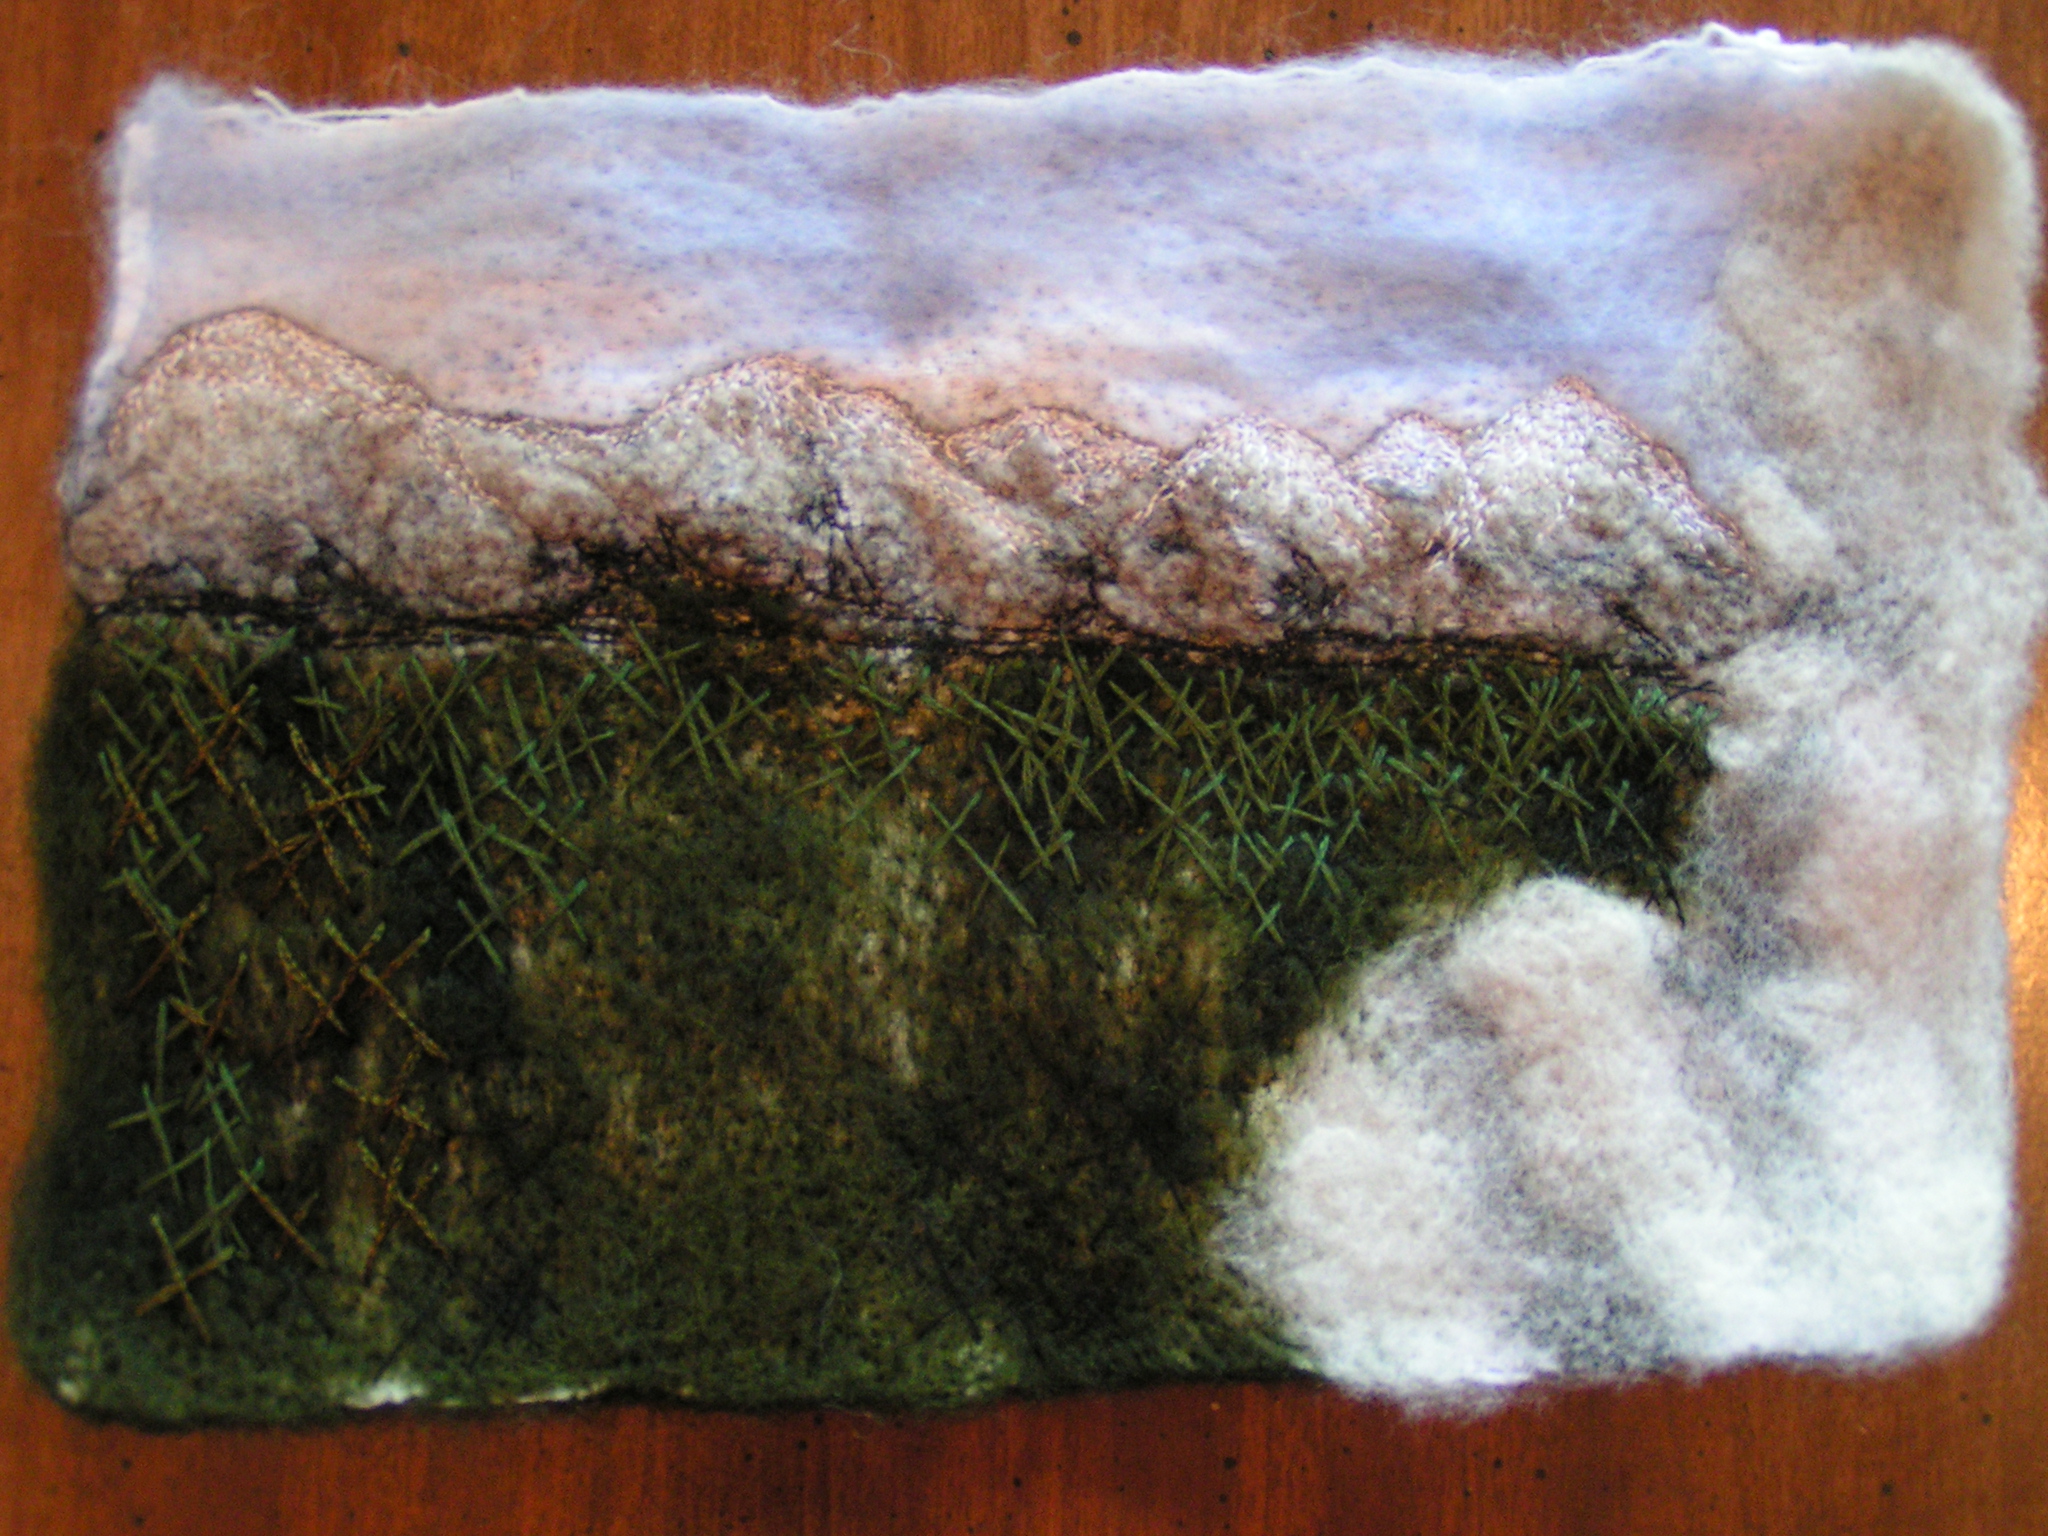
I haven’t gotten much work done on my felted landscape but I have started the stitching in the tree section. If you click on the photo and enlarge it, you’ll be able to see the stitching a bit better. It still needs a lot of stitching. I’m not sure why I haven’t been working on this one but somehow, I’m not too excited about it. But I’ll get it done eventually. What have you been putting off?

Cottage Garden

 This is a photo of a needle point piece that my mother made in 1988. It hangs with a companion piece made by my father over our bed. I have always loved this look into a cottage garden. I needed to do another distorted cross stitch piece for my home work for Level II stitch class so I chose this needle point piece as my inspiration. The original needle point is 11″ x 15″ and the cross stitch piece was to be 3″ x 3.75″ so I decided to make the garden a bit simper and leave out all the buildings.

 Here is what I started with as a background. I fused these pieces down to the background.

Here’s the end result. I used distorted cross stitch throughout except on the wall and the cobblestone path. I used straight stitch for those. I didn’t like the color of the wall after I got finished so I darkened it up a bit with Inktense pencils. I’m pleased with the results and actually liked doing this one better than the first because I had an inspiration to follow. Does it look like a garden to you?

Color Mixing with Distorted Cross Stitch

 Here’s one of the samples that I did for Level 2 Stitch. We started with cut up bits of fabric and then added distorted cross stitch over the fabric. This is the base which was the starting point.

And this is the end result. About halfway through, I thought it looked like a big mess. But I persevered and it did finally look a bit like what I had imagined when I started. The point was to use the stitching to mix the colors and achieve a look of foliage. I need to do another sample for homework and I’m thinking I’ll do one based on a garden against a rock wall. I considered doing a winter scene but I don’t really have the threads needed for that one. But I am going to dye more so… I’m sure I’ll make up my mind soon.