Soy Wax and Shibori

My local surface design group met today and we played with soy wax and shibori. We have done both of these techniques separately but haven’t combined the two before.

Soy Wax Tools

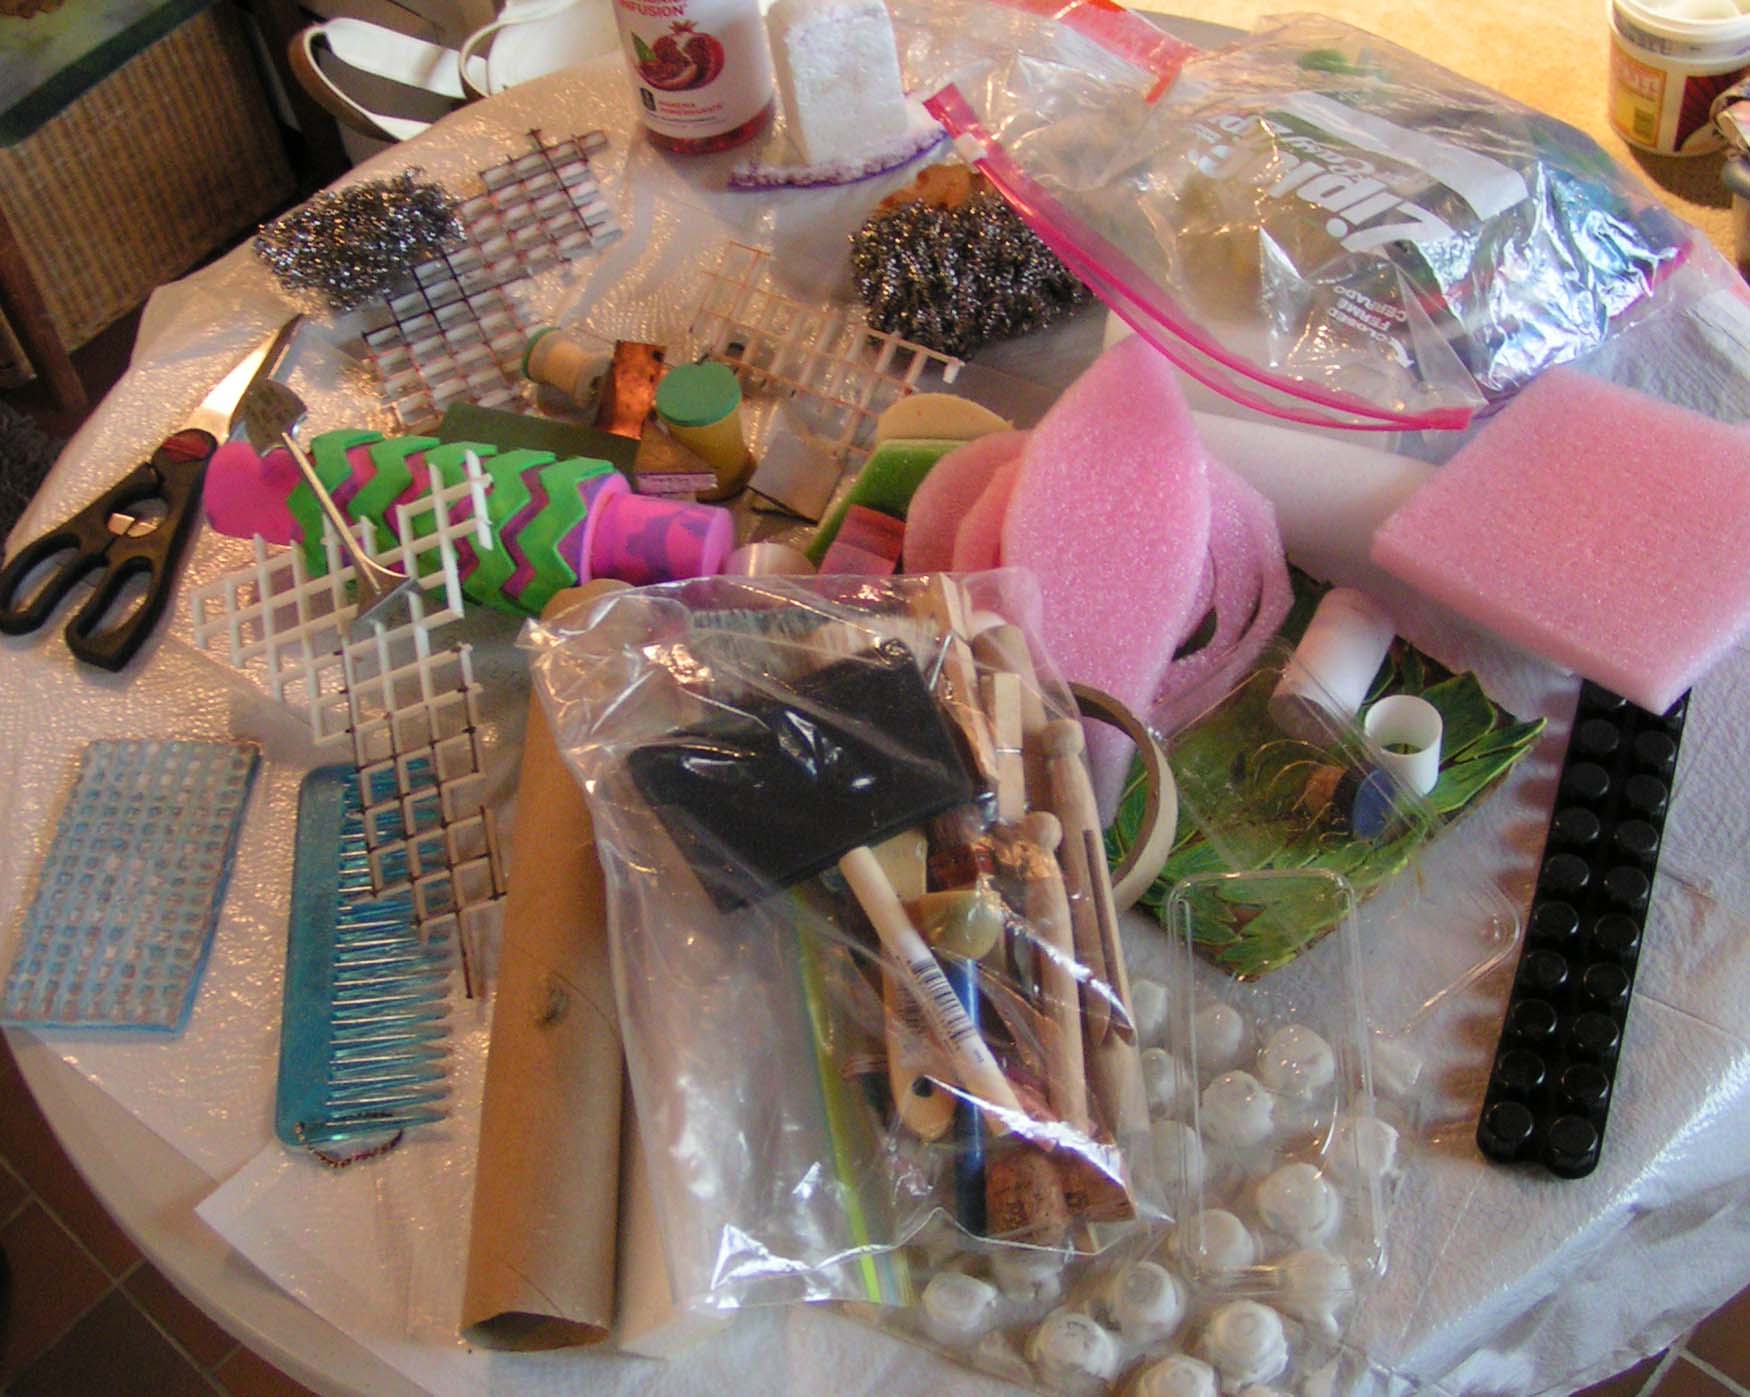
We brought a bunch of different items to apply the soy wax to fabric and paper.

Soy Wax Set Up

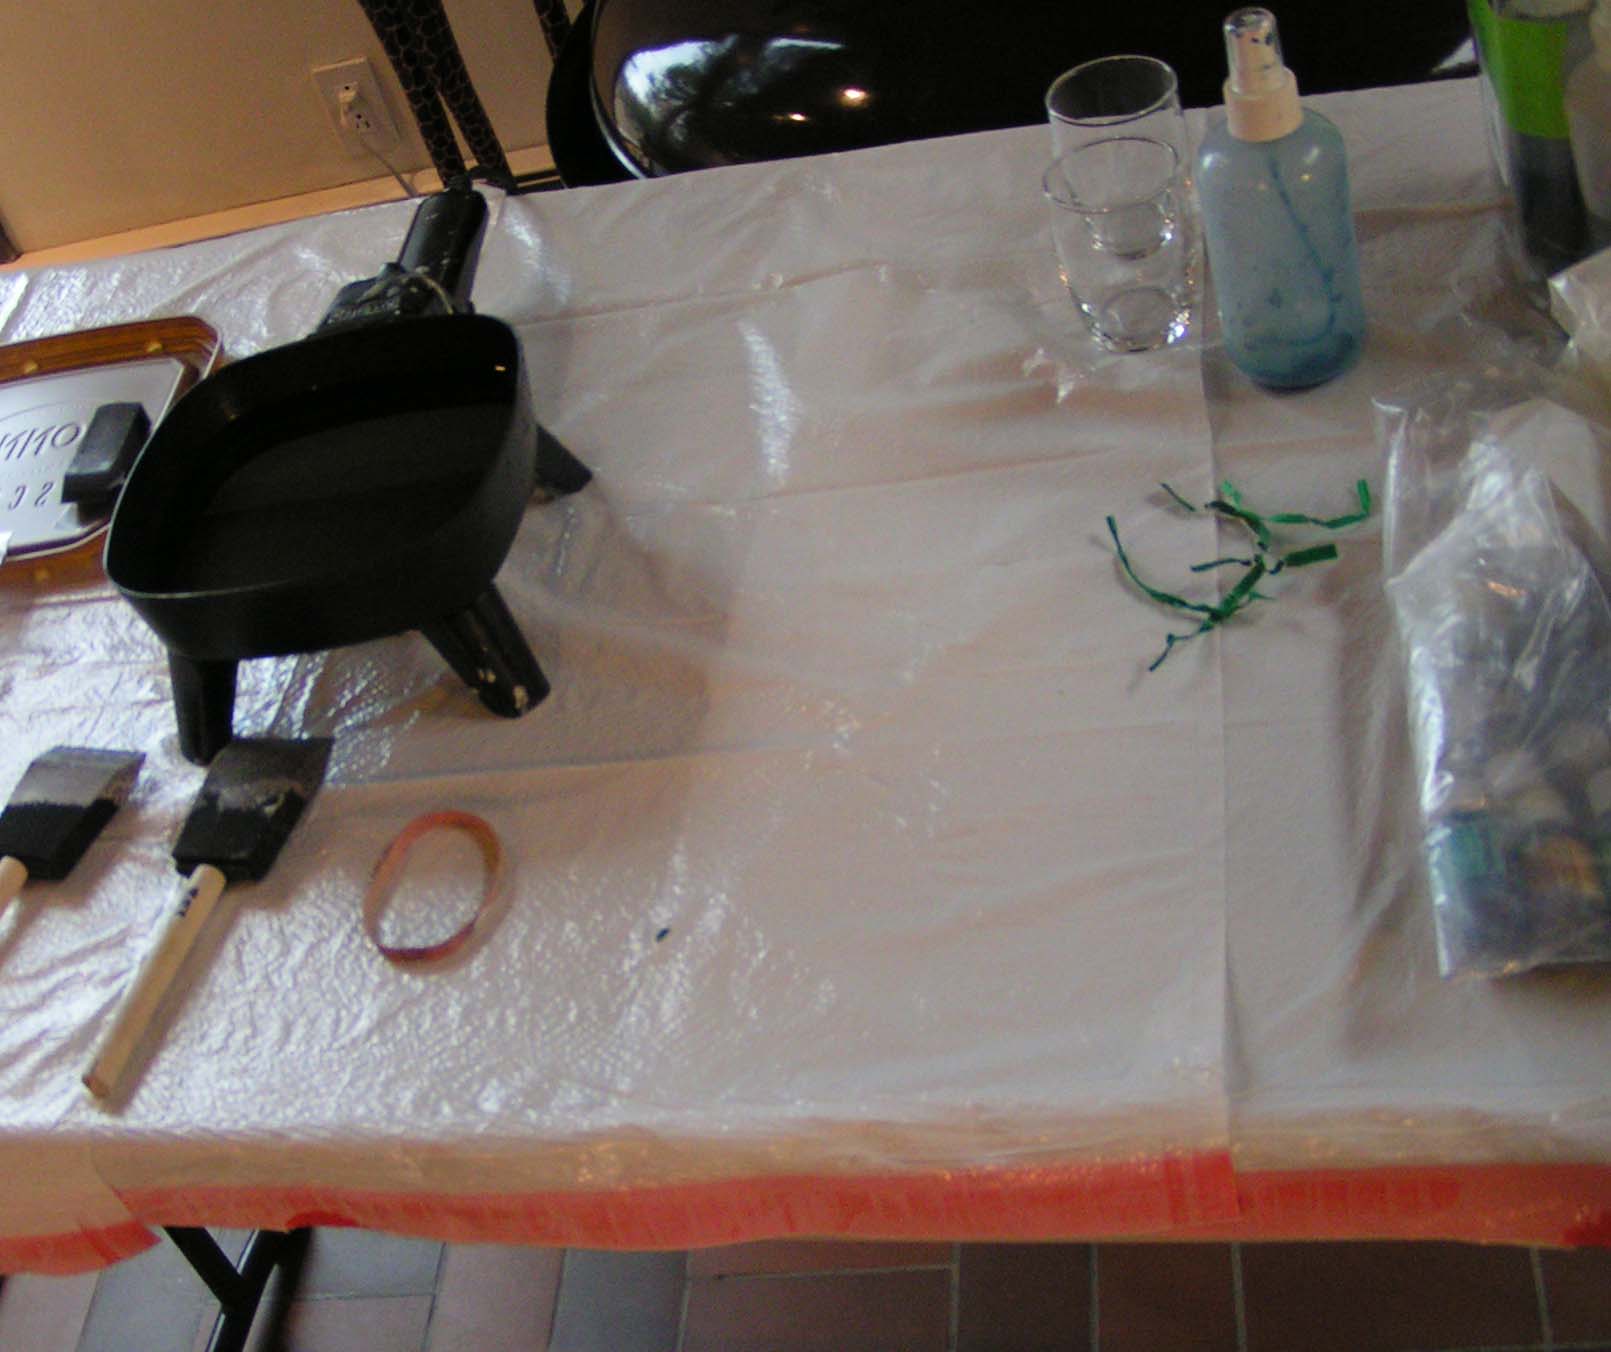
Bunny had everything set up for us, we turned on the electric skillet with the soy wax and it melted very quickly. So we were ready to go.

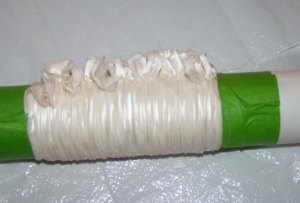
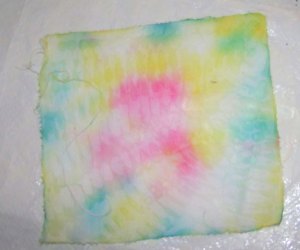
I had previously stitched a few pieces to shibori and Bunny had wrapped some pieces of silk on a pole ready to go. We applied soy wax to the shibori pieces and then added dye afterwards. We used Color Hue dyes which don’t require any sort of pre-treatment to the fabric and set almost immediately.

I had a bunch of pieces of fabric that had either been painted or dyed before. I added soy wax with a variety of tools.

Soy Wax and Dye Applied to Multi Color Fabric

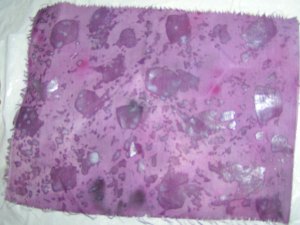
And then added the Color Hue dyes.

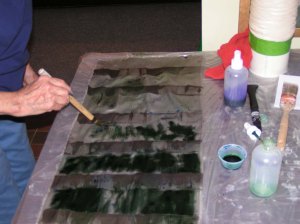
Here you can see Bunny and Louise adding dye to their fabric that had already had the soy wax applied. I am now waiting for the fabric to dry and then I have to iron the wax out of all the pieces. So I will have to show you the results later. We had a good time and I think I made some pretty ugly fabric somewhat better. But I guess we’ll see!

Gotland Locks from Sweden

Look what came in the mail yesterday. They left Sweden on October 28th and arrived in Montana on November 2nd. Amazing!

Gotland Collage

These are gorgeous Gotland Locks from Zara in Sweden. I got a box full of locks which I shared with my friend Paula. Not sure what I am making with these yet but maybe the fourth quarter challenge needs some locks!

If you would like to get some of these lovely locks, check out this post on the forum.

Still Stitching Crazy

I’m still working on the crazy quilt square that I showed you last week but I have all the seams finished. I decided I would add a bit more to the centers of the pieces too as they looked kind of bare. I did try seven new stitches though. Here is what I have learned.

Basque Stitch

This is the Basque stitch. It is a combination of buttonhole with a twisted chain.

Braid or Cable Plait Stitch

This dark blue line is the Braid or Cable Plait stitch.

Knotted Pearl Stitch

The brown stitch on two sides of the triangle is the Knotted Pearl Stitch.

Mountmellick Stitch

The seam stitches in blue are the Mountmellick stitch. Kind of looks like a row of little triangles.

Finished Palestrina Stitch

I went around the edge of the Palestrina triangle to finish that up.

Portuguese Knotted Stem Stitch

The wavy line in blue is the Portuguese Knotted Stem stitch.

Raised Stem Stitch

And this really thick blue line is raised stem stitch.

Full Crazy Quilt Square

And here is the full square as it is currently. I plan on adding a bit more and then I will make it into a pillow. And that will be one UFO completed!


Not Much of a Crazy Quilter

I have had this UFO lying around for several years now. The quilt itself was made by one of the members of our surface design group 2-3 years ago. She was teaching us a new hand stitch each session and we were supposed to decorate the crazy quilt with that stitch. However, she quit our group and I never did anything further with it.

Crazy Quilt

So I decided I needed to finish it and then I can make it into a pillow.

Crazy Quilt - Stem Stitch

The light blue on this section is stem stitch. I don’t really need any more practice on this stitch as I use it frequently.

Crazy Quilt - Pekingnese Stitch

This is Pekinese stitch around this triangle. Essentially a back stitch with further wrapping with another thread.

Crazy Quilt - Palestrina Stitch

This is Palestrina stitch on the blue triangle. It helps if you draw a line to keep it straight. I got a little wobbly in the middle section. I keep forgetting how to do this stitch and have to look it up each time to make sure I get it right. It’s not that hard but…

Crazy Quilt - Cretan Stitch

This one is Cretan stitch along the dark green.

Crazy Quilt - Combo Stitches

And this is the one I started with and it looks the most like crazy quilting is supposed to look like. Somehow, I can’t seem to keep up the fanciness of it all. This is a combination of Blanket/Buttonhole stitch, combined with Detached Chain and French Knots. But I am slowly making progress. I think I will try some other stitches that I don’t normally do so I can get a bit more practice. The thread I am using is all wool which I dyed naturally with indigo and a few other natural dyes which I have completely forgotten what they are. So hopefully, I will finish this soon and start on a hand stitch project that I like to do. Hope you have a nice weekend and thanks for dropping by.

Color Inspiration

I visited New York City last week and found lots of colorful inspiration. We went to the New York Botanical Garden and I took hundreds of photos. These are just a few, plus one of some peacocks from the Staten Island Zoo. I think all of these will be wonderful for developing color palettes.

If you get a chance to visit the botanical gardens it is well worth it. There was also a Frida Kahlo exhibit which we enjoyed.