Second Nuno Felted Paper Fabric Lamination Sample

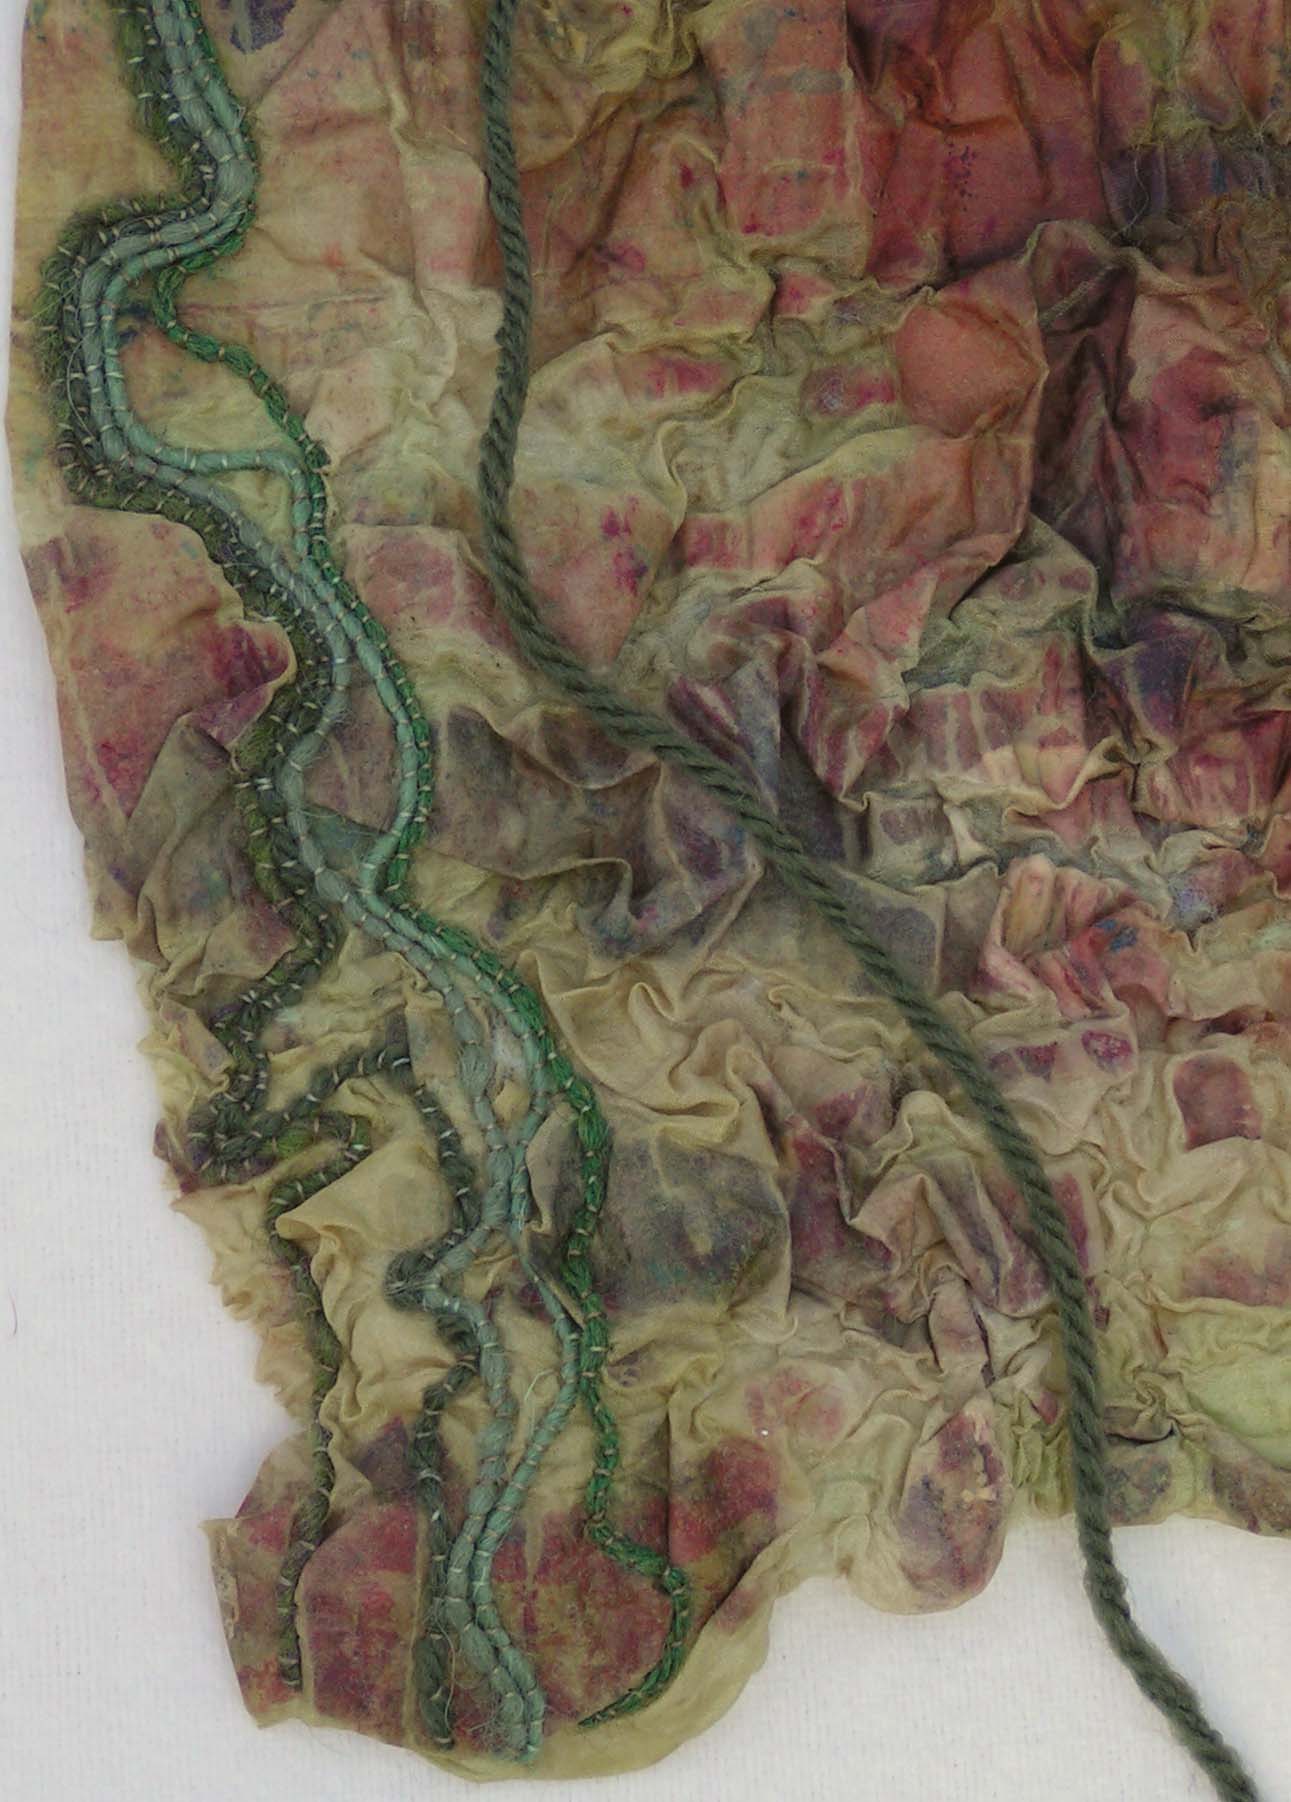
I started working on the next sample of the nuno felted paper fabric lamination piece. I had decided to couch some small sticks down to the surface. So I collected a bunch of interesting tamarack sticks on my walks in the morning. They are quite bumpy and textured.

Couched Sticks Currently Stitched Down

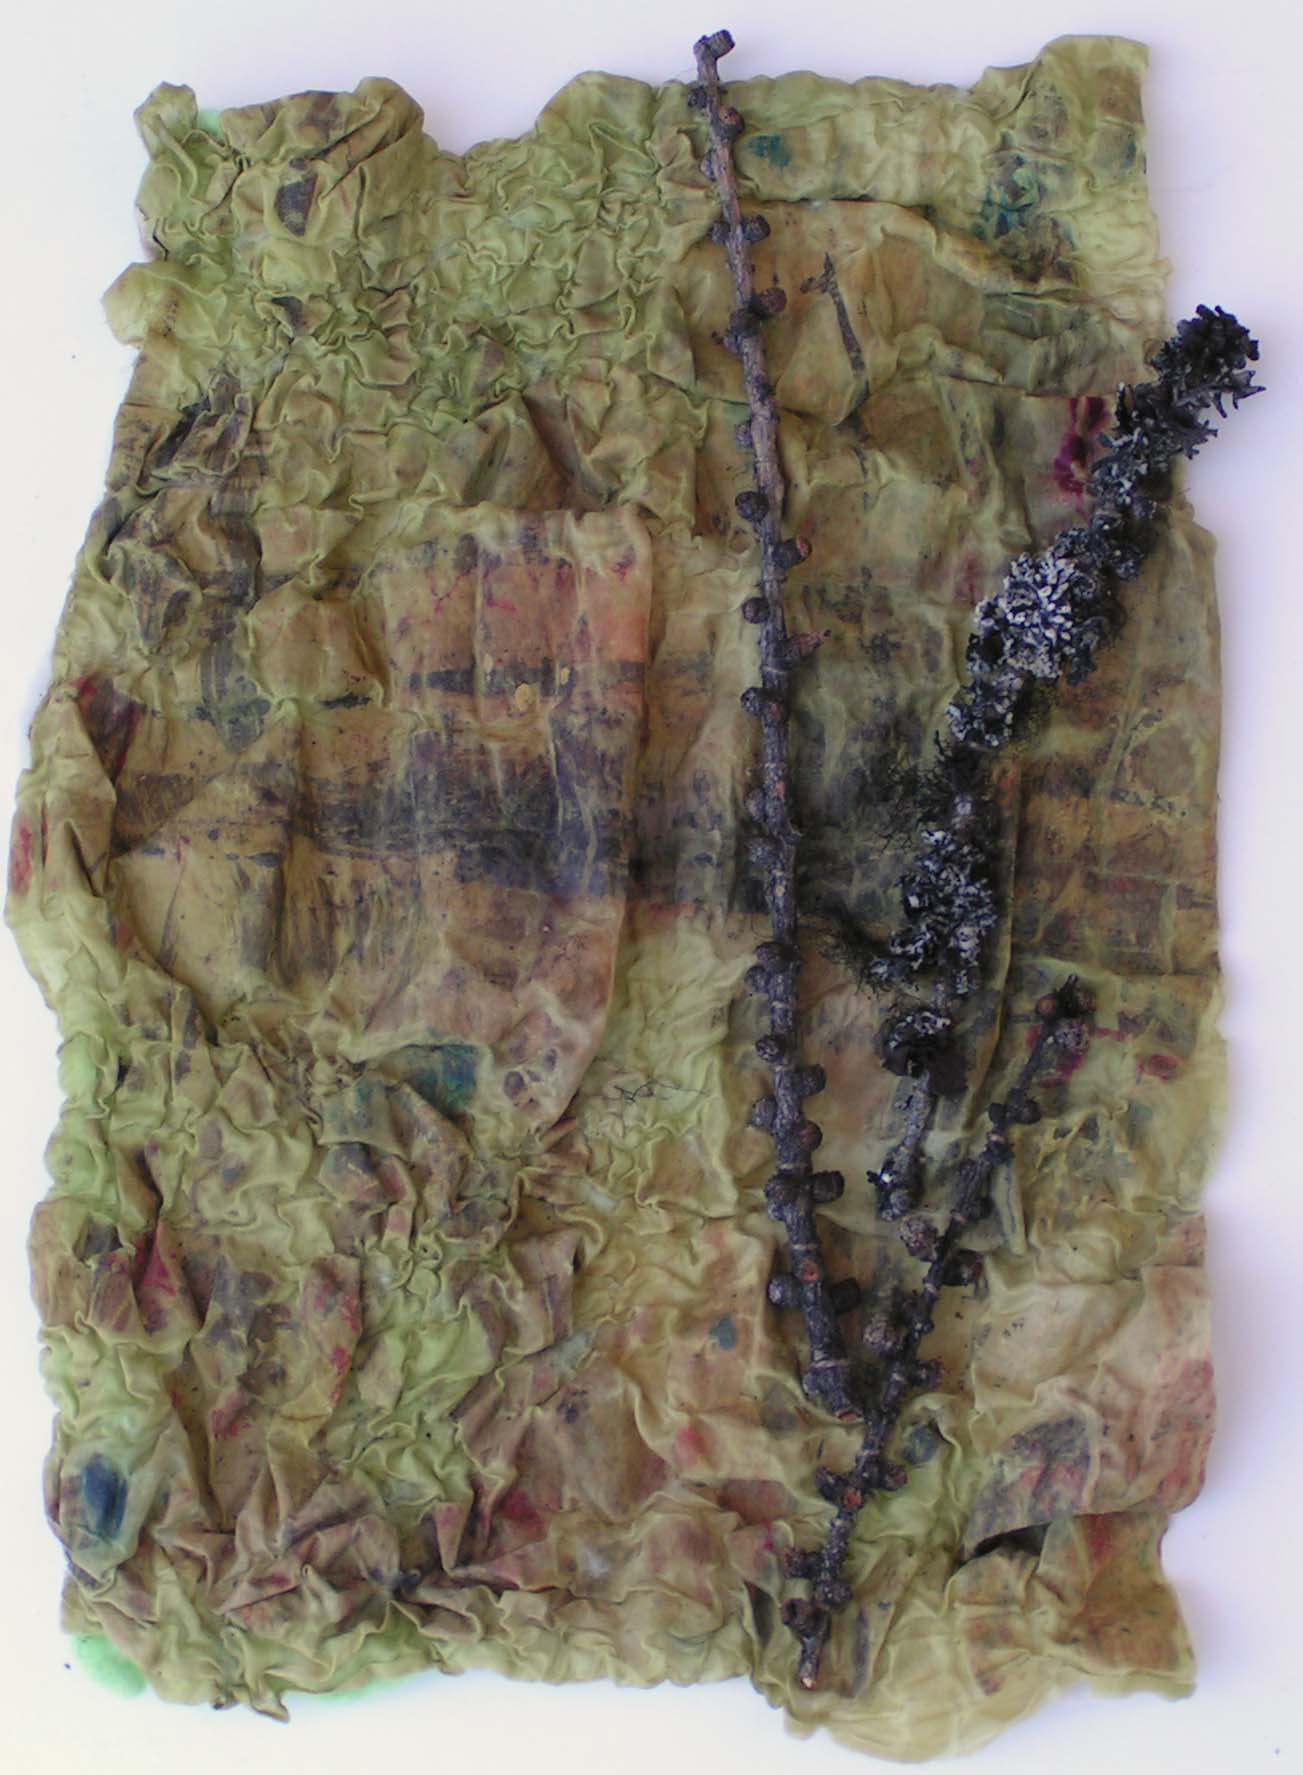
So here are the ones that I have currently couched down. I used one that is nearly covered in lichens too. But I’m not very happy with the result.

Couched Sticks First Option

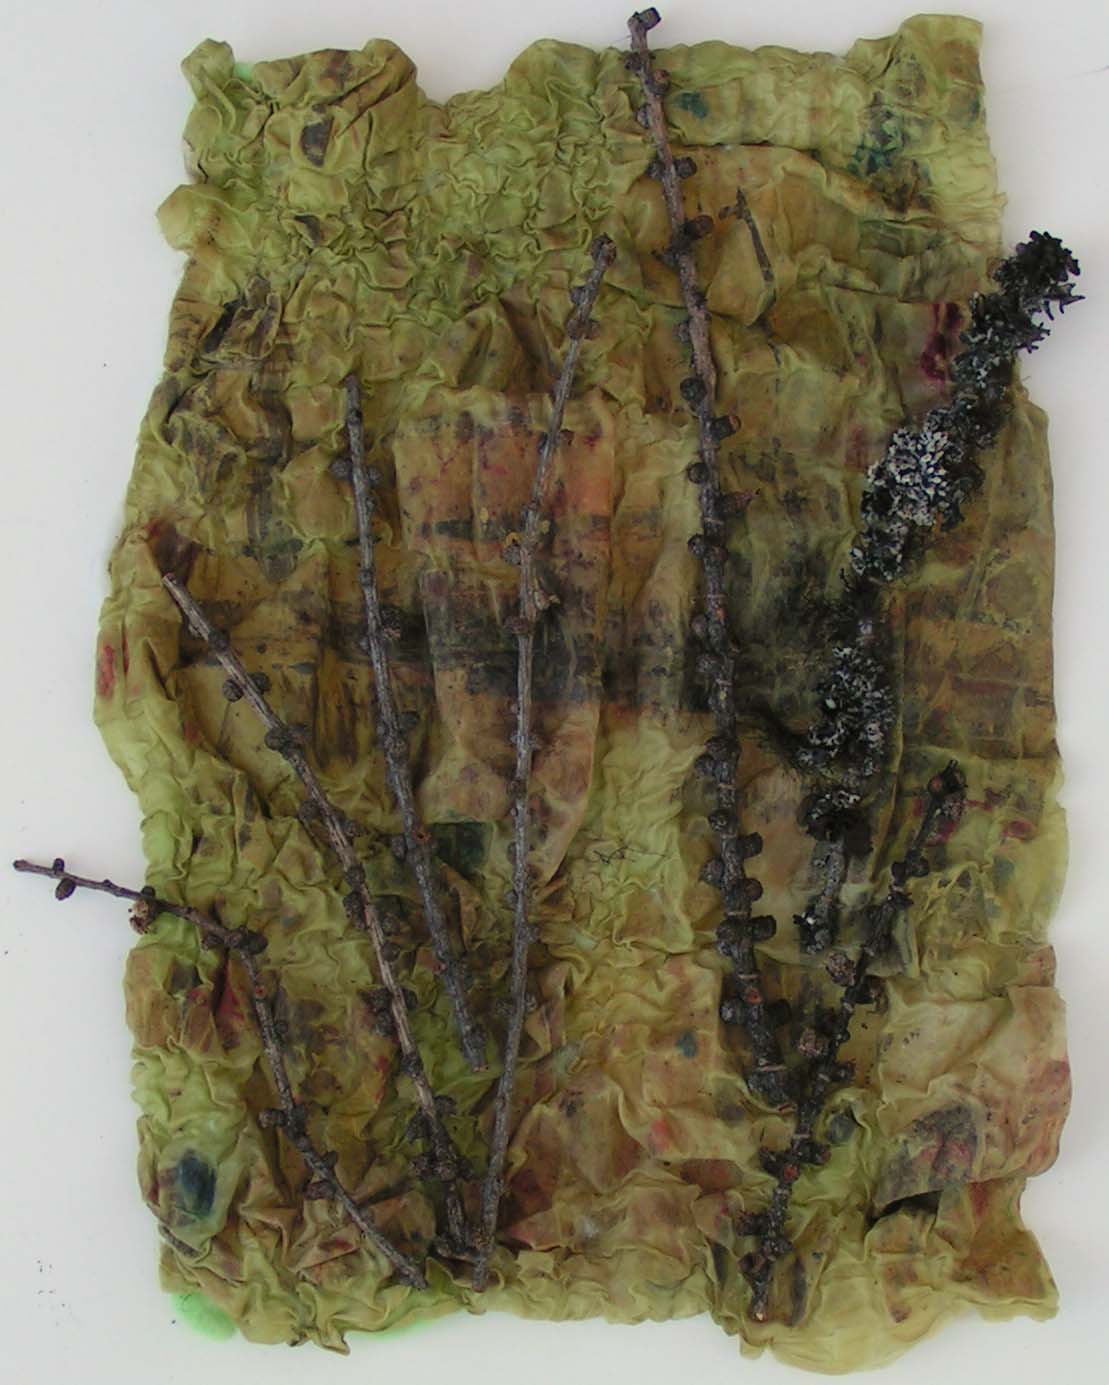
I was originally planning on adding a lot more on the left side but didn’t like that either. So now I am playing around with different layouts.

Couched Sticks Second Option

I think part of the problem is that the sticks on the right are very dark and the rest of my sticks are lighter. But the overall problem is that the sticks are too textured. With all the texture in the background plus the texture on the sticks it seems too overwhelming. I can see this much better since I took a photo of it. I will probably take the sticks off and start again with smooth sticks and see if I like that better. What is your opinion?

Couching Begun

I got started couching various bits of yarn down to the nuno felted paper laminated silk piece.

Paper Fabric Lamination Nuno Felted Silk with Couching

The photo above shows the entire sample which I am in the midst of stitching. I have a lot more couching to go.

Close Up

Here’s a little closer view. I am using up scraps of yarn that I have in a variety of green shades and a few reddish-brown ones too. I think this one might take a while.

Holiday Postcard Exchange

I got word from Angela that she received my holiday postcard. So I can show you what I made for her.

Nuno Felted Poinsettias

I started with a nuno felted paper laminated poinsettia. The fabric that I used was some type of really shiny organza. I didn’t test it in advance for nuno felting which was a mistake. It just didn’t work all that well. It did attach but the wool fibers just didn’t want to stay attached very well.

Stitching Added and Cut Back Applique

Stitching to the rescue! I stitched around the main items. You can’t see very well in the first photo but there were brown stems underneath the fabric. I stitched on both sides of the stems and then cut back the fabric. Then I decided to cut away a bit more of the fabric from the center of the poinsettias. I had started with a size that was much bigger than the postcard. So I cropped it down until I found a pleasing design.

Holiday Postcard

I then added some gold beads to the centers of the poinsettias and attached it to a piece of heavy interfacing with white fabric on the back. Then I stitched around the edges three times. The thread kept breaking and it was driving me crazy but finally I switched to a metallic needle and it worked fine.

Close Up

Here’s a little closer view. I am happy with the results although I got a bit discouraged in the middle of the process. But that’  usually how things go, isn’t it? Have a great weekend and thanks for stopping by.