Daily Dose of Fiber – Day 5

I’m still plugging along working every day on something creative. Today I worked on several projects, mostly applique homework.

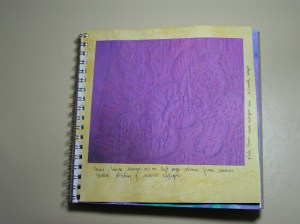
 I finished stitching the needleturn applique aspen leaf. As you can tell from this photo, it doesn’t lay flat. Sigh.

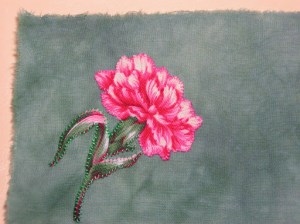
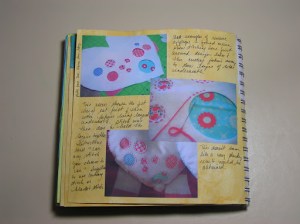
 This is my Broderie Perse sample. I worked on this while we were driving around doing errands. Luckily, hubby drives, as stitching and driving doesn’t always work out well. I needed a better match on the green thread I think.

 Here is the finished aspen leaf. I added a stem with (drum roll, please) stem stitch. The veins are drawn on with colored pencil. I thought further stitching over the leaf itself would emphasize the fact that the fabric was not flat and it would look worse than it does.

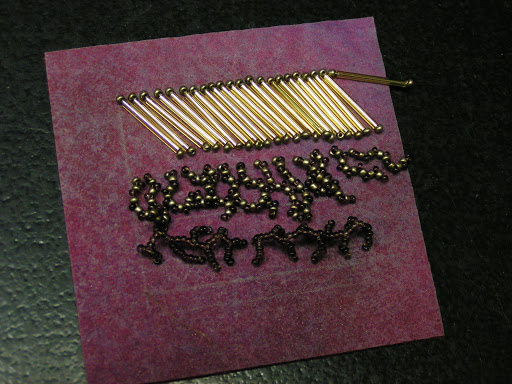
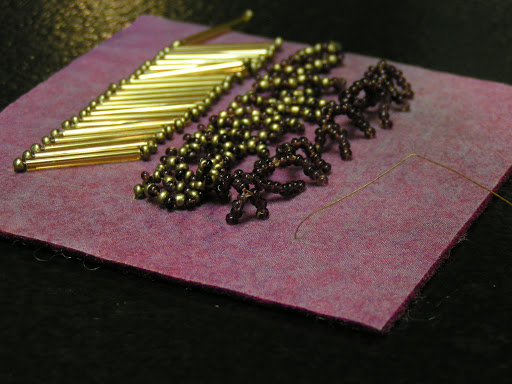
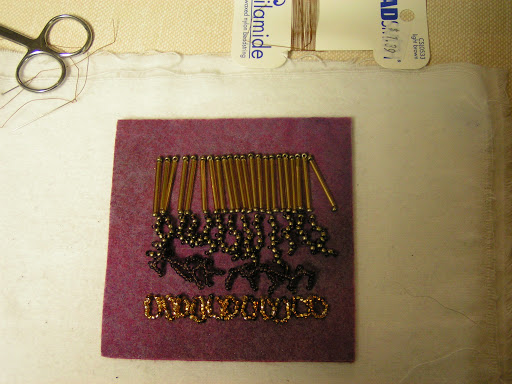
This is what I have been doing this evening. The design on the right side is in paper and one that I did in class in November. It’s based on the “eyes” on the trunks of birch trees. I am now cutting out the pieces in felt to do an applique of the design. The cut out felt pieces are on the left. You can see my patterns just above the scissors on the right.This will be a shadow applique with a  piece of organza over the felt. I will have to audition the various colors of organza to see how they affect the black and white design. I’ve gotten quite a bit done this week and I’m happy with my progress. What have you been working on this week?

Daily Dose of Fiber – Day Four

 Friday is my fiber day as I am off from work and get to spend all day doing fun stuff. Today I am continuing working on my class homework. Part of our assignment this time is to do a bit of study about various kinds of applique. So I looked up reverse applique and found some wonderful photos of molas.

 Molas are from the Kuna Indians who live on islands off the coast of Panama. They use these colorful geometric designs on the women’s blouses. And most are done with reverse applique. That’s where you have several layers of different colors of fabric. The fabric layers are sewn together in a design and then the top layers are cut back so you can see the colors underneath.

 This isn’t a very good photo but this is the stitching on the back from the horse design above. If you search for Molas online, you’ll find some wonderful examples.

 I also found this reverse applique technique on the Sew, Mama, Sew blog. She has a tutorial if you’d like to try it out.

 Another assignment is to write a book review of an applique book. I couldn’t find many at the library that weren’t just basic felt appliques sewn in “cute” patterns. This book The Art of Elegant Hand Embroidery, Embellishment and Applique by Janice Vaine was the best of the bunch. It really only talks about needleturn applique but it gives a very thorough explanation. It also has a stitch dictionary which is handy for adding embroidery to applique pieces.

 I also looked up Broderie Perse earlier as I needed to do an example of that type of applique as well. It is essentially fussy cut applique where designs from Chintz type fabric are cut out and appliqued to a solid background. Here I have fused the flower to the background. I haven’t stitched this yet but I’ve got it all ready to go so when I have free moment, I can stitch the flower down.

The last thing I worked on today is this needleturn applique of an aspen leaf. It is sort of tedious work and stitching the felt applique is considerably easier. But I’m making progress despite leaving a big loop of thread on the back of the fabric, tying a knot in the working thread and then breaking the thread in mid stitch. But I will persevere!

A small update on the progress of yurt building. I am searching for a local source of wool. I have gotten several names of people who can spread the word of what my needs are. A local Montana wool processing mill was also recommended, Sugar Loaf Wool. I will be contacting them to find out what the schedule is for getting the wool washed, carded and made up into batts. They make big batts for bedding so I think this might be perfect as it will speed up the layout process considerably. So small steps forward on the yurt project.

Hope you have a nice weekend!

Daily Dose of Fiber – Day Three

I only had a few moments today to work on my beading. You will notice that I have the design finished on the page since yesterday’s post but I did that last night. All I did today was about 4 inches of edging. I haven’t decided how I am going to finish this edge yet. What I’m working on now is just the base so I’ll add another row of something soon. I have learned that designing in beads is very different than designing in thread or fabric. This design looks better on paper somehow. It’s much to “eye-like” for me at this point but I’m not going to change it. Getting those long bugle beads lined up was also a bit of a challenge. I’m certainly learning new things though!

Daily Dose of Fiber- Day Two

I’m still working on my beaded book pages. I didn’t get much done today.

 I did finish the single bead edging on the fringe page. I will be adding a variety of fringe techniques to this basic edge. But I wanted to get the other two pages finished that I have left.

 Here is the page I started working on today. I have the design marked and the cabochon glued down. I’ve never done a beaded cabochon so I thought I’d give it a try.

This is the basic cabochon bead attachment. There are two rows of beads around the cabochon. You can enlarge the photo to see it better. Now I am working on adding the bugle bead row. It is hard to get the bugle beads aligned exactly. But with practice I am getting slightly better at it. I’m off to stitch a few more beads down. Have a good evening and thanks for stopping by.

Daily Dose of Fiber – Day One

I’m working today but when I get a few spare moments and no one is in need of me at the store, I do a little stitching. Today I worked on a beaded book that is a homework assignment for my stitch class. I was not particularly excited about beading before I started this book. Every time I have tried to add beads to my work, I don’t like them and usually end up taking them off. This book has been different though, it’s been fun and I actually like the results. I think this is because the book is so small. The pages are 4″x 4″ and therefore the beads aren’t lost on the page. It takes a lot of seed beads to fill up large spaces and even the 4″x 4″ seems big with seed beads.

Here’s the page before I started working today. It’s in a tray to keep the beads contained. I am using Silamide thread which I really like. I tried a cheap thread from JoAnn’s and it was awful compared to the Silamide.

Here’s my tub of beading stuff that I have been taking to work each day. There are some finished pages in the bag that I’ll show you later.

This is the second book page I have done with examples of fringe. The top row is long bugle beads, the second row is “spiral” fringe and the third row which I did today is branched fringe that has been stitched down to the page. I have already done regular branched fringe and I wanted to try out this other method.

The fun thing about this one (it really isn’t fringe) is that you can make it stand up off the page to give extra texture.

I then added a row of looped fringe below that. I think the looped fringe would look better longer but I didn’t have much room left on the page. I started the edging for this page but didn’t get very far. I suddenly got swamped with shoppers down from the ski slopes. Luckily the boss is a nice woman and lets me do what I want. I’ll probably work on this page further at home tonight. I’ll show you the results tomorrow.

What did you do today that is creative? I’d love to hear what you’re working on. If you want more information about A Daily Dose of Fiber check out my post over at The Felting and Fiber Studio.