Doesn’t that sound like we’re going to be on reality TV? Did you hear Tim Gunn in the background with “Make it work, Designers!” I hope you’ll want to join in my journey into learning about Design Basics.

This is the first of many posts that I’m writing about design. All of this information I have gleaned from reading online, books and magazine articles about design. I will provide as many sources as I can and by no means is anyone to think I’m a design expert. I am just trying to learn more about design. To do this, I have formed a small group of local fiber artists which will be meeting once a month. As a group, we want to learn more about design principles and elements. So I volunteered to lead this part of the meeting. Since I have to teach someone else, I better learn about it first. This gives me incentive to really learn about design and challenges me to become more proficient in the use of these elements and principles in my work. Since I am already doing the work, I thought it would be fun to post the information here and anyone can follow along and join in the fun.

Each month, I will post the design topic, give an explanation and give resources for further information. I will then have a list of questions that you can begin asking about your work or your studio journal explorations to help focus in on that design topic. Anyone can join in and when you post your efforts on that design topic, please let me know and I’ll include a link to your post or photos so others can see what you’ve created. You can use the design topic to do work in a studio journal or create a piece of fiber art or whatever kind of art you make. I’d love to see your creations so don’t forget to leave a comment with your link so everyone can see. Please also spread the word to others if you get a chance.
Instead of focusing on “exercises”, I have decided to use open ended questions to start you thinking about the particular design concept for the month. I decided on this method after reading the website of
Marvin Bartel. He is an art professor at Goshen College in Indiana. You should definitely check out his website as it has wonderful information about
teaching creativity,
learning to think artistically, and a list of
creativity killers that I wish my teachers had read before they taught me.

This month, I’m doing an overview of design elements and principles. These are pretty standard and although there are some variations noted in different sources, I’ve tried to provide a comprehensive list. To develop a composition, you will be using design elements arranged with the principles of design in mind. There are no really hard and fast rules but the design principles can guide you to create a piece that draws the eye and keeps the attention of your viewers so that the message you are trying to express comes through in your art. Think of the elements as your building blocks and the principles as guidelines to follow in how to place your elements to achieve your best work.
Elements of Design
1. Line – A mark on the surface that can be thick or thin, smooth or jagged. There are many types of line such as vertical, horizontal, diagonal, actual or implied, contour etc.
2. Shape –A line that comes together to form a 2 dimensional object which can be geometric or organic.
3. Form – A 3 dimensional object such as sculpture with real volume or thickness. It can be implied 3 dimensional shape using shading, lighting or other techniques in a 2 dimensional work.
4. Texture – The surface quality of the object whether it is rough or smooth. This can be actual texture or it can be implied by various techniques.
5. Color – This refers to the hue used from the spectrum of colors. A basic color wheel can be used to determine a variety of color schemes in including monochromatic, complementary, analogous or triadic.
6. Value – A property of color, value refers to the lightness or darkness in a composition. Contrast can be depicted by changes in the values you use.
Principles of Design
1. Center of Interest – Also called the focal point or emphasis, it is the way to catch the viewer’s attention. The center of interest is more important in the composition compared to the surrounding areas.
2. Harmony/Unity – The presentation of an image that is integrated and pleasing to the eye. Agreement exists between the parts and provides visual connection.
3. Balance – The distribution of the visual weight in a composition provides equilibrium to the piece. This can be symmetrical, asymmetrical, crystallographic or radial. All of the elements of design can be used to create balance.
4. Scale/Proportion – This refers to the comparative sizes of the components of the composition. It is relative, size measured against other objects or against a “normal”.
5. Rhythm – Refers to the movement of the viewer’s eye over repetitive patterns in the composition. It involves a clear repetition of an element in the piece.
That’s the basics – it’s really not that complicated. I know that many people don’t feel confident in design because they haven’t been to art school. I haven’t either. But I think that together, we can work through these each month and it certainly won’t cost as much as art school!
So for the first month, do a little research. Look at the links I’ve provided below. If you have the time, the book
Design Basics by David A. Lauer and Stephen Pentak is wonderful. I found a copy in my local library and it was the first design book that I’ve been able to read through without falling asleep. Do you have a sketchbook or studio journal? Do you use it much? Here’s an opportunity to start. Take a look at artwork that interests you either online, at a museum or from a book of your favorite artist’s work. How did that artist use the elements of design? Are the principles of design evident? Go through the list above and ask yourself how the artist used each of the elements and principles in the work. Why does a certain piece catch your eye and another doesn’t? Let me know how it goes and check back next month as we start with line.
http://desktoppub.about.com/cs/graphicdesign/a/designbasics.htm
http://daphne.palomar.edu/design
http://char.txa.cornell.edu/
http://www.artgraphica.net/free-art-lessons/watercolor/watercolor-values.html
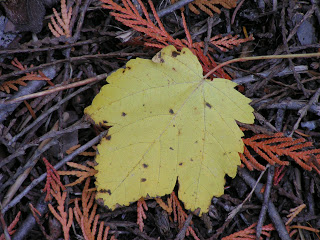
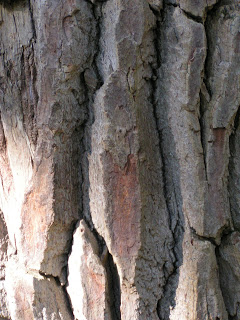
(All photos were taken last week at Glacier National Park.)