
Here’s the final rendition of my April TIF which is called “Transformed”. I sewed the piece to the green mat. See earlier posts for how this was made. I worked today on two pieces of felt to make a couple of bags as well as playing with some oil pastels. So hopefully more updates this weekend. I have also been working on my artist’s statement for May TIF. I have a first draft and I’m trying to decide if I want to do a logo or just use photos of my work. More later…
Author Archives: ruthlane
April TIF a Bit Late and Self Portrait

I’m a bit late with my April TIF. I have sewn all the parts together and went around all the edges again to give the edge a bit more definition.
I then cut out a mat board to size and painted it green. I haven’t attached the piece to the mat board yet. I am still trying to decide if I want to do more with the mat board. I was thinking of mottling the paint and adding some pieces of green papers to match the technique I started with but was unsure if it would take away from the work on the piece. So what do you think, should the backing just be plain or more collaged? A note on May TIF – aaaaaaaaahhhhh…. What do you call yourself and why? I think I may work on an artist statement and business cards etc. for this month. Currently, I don’t really have anything that explains what I do and it would certainly be more professional to have all this done. So that’s what I’ll be doing for the May TIF.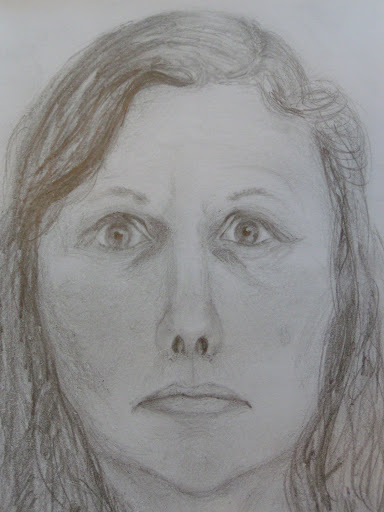
I started working on improving my drawing techniques about 6 weeks ago with the help of a drawing book. I haven’t had a whole lot of time to draw and sketch but I’ve been trying to do 1-2 sketches per week. I got up to the portrait drawing part of the book and it suggests you do a self portrait thus allowing you lots of time to stare at your model. So here it is – my sketched self portrait. When I showed it to DH, he said “Oh, you drew a picture of yourself”. So I guess it looks like me. The nose is a bit off and there seem to be fewer wrinkles in the drawing than are really on my face – I guess that’s artistic license. ;0)
Last Journal

Here’s the final journal in Sue B’s course. I used more of the faux leather since I made such a large piece. I have enough for at least one more journal. I embellished with pipe cleaners wrapped with novelty yarn and similar beads.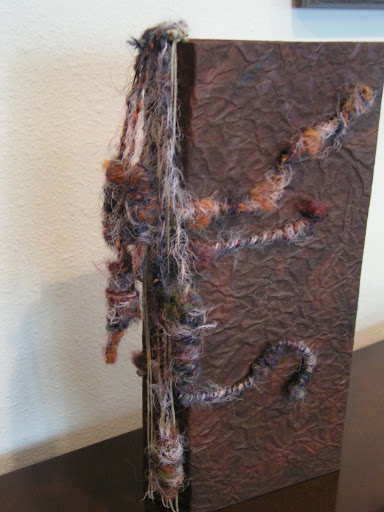
Here’s a side view of the spine.
and a blurry photo of the back.
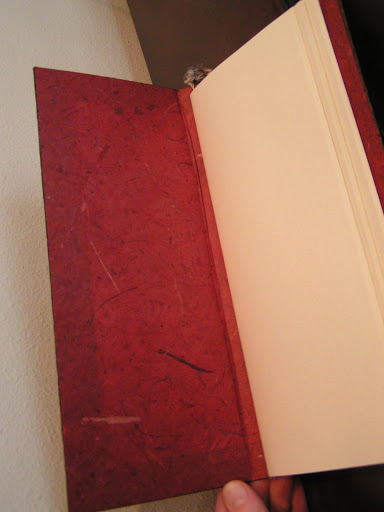
Here’s the lining of red hand made paper. This journal has three signatures.
A short note on my Vegas trip. We went to see Spamalot which was great fun. It is in the Wynn. I was quite surprised by the decor in the Wynn. Most Vegas hotel/casinos are very glitzy. The Wynn was decorated with thousands of tassels in all sizes and colors. Tassels were everywhere. Then in the hallways and alcoves, there were large framed embroideries. I was going in and out of all the side hallways and little cubbies to see all of them. Then by the convention center they had two huge panels that were made up of wooden printing blocks. They were gorgeous and there was unconcealed larceny in my heart! But I couldn’t quite fit two 15 by 5 foot panels in my luggage. And of course I didn’t take my camera because who wants another Vegas photo? The wholesale trade show for the store was disappointing. I’m not sure we’ll go back next year. But if you’re in Las Vegas, do stop in at the Wynn and take a look at the fantastic fiber art on display.
Faux Leather Journal

Here is the sheet of faux leather that I made for the next journal in Sue B’s course.
Here’s a close up. What do you think, does it look like leather?
Here’s the completed journal. It was a bit later at night when I took this photo so it appears darker.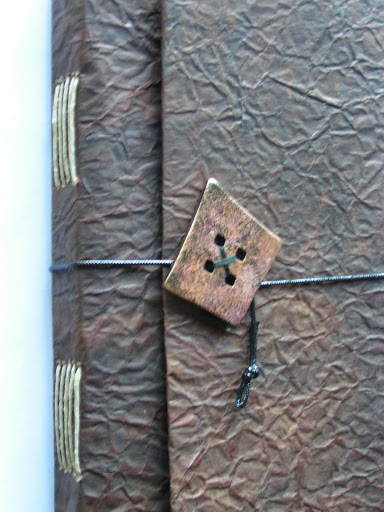
Here’s a close up of the spine and the button. It’s a black one I bought and then painted with metallic paints.
Here’s a photo of the inside. There are 5 signatures with 10 pages each. I didn’t add anything fancy as I had to get it done quickly. I’m going to Las Vegas and won’t be back until Monday. It’s for a trade show for the store otherwise I would certainly skip Vegas as it isn’t really my kind of place.
April TIF Progress

Here is the base that I made for TIF. It is fabric paper made with paper towels that I’ve used to clean up from other projects. The base is mainly green and then I cut out lowercase delta symbols in the red/orange and put them on top of the green. I let that dry and then cut it up into various pieces.
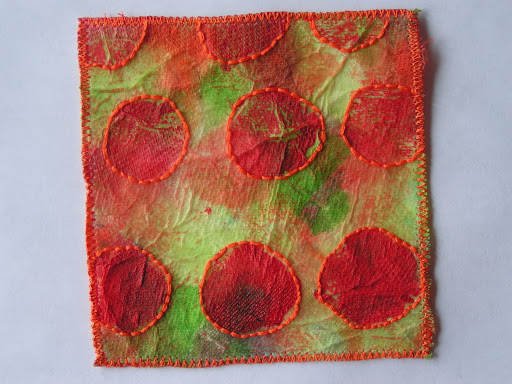
Each piece was then “changed” with different techniques. This one was printed with bubble wrap and orange paint. I then hand stitched around the resultant circles.
This one was covered with brown netting. All of them have been edged with zig zag in tangerine thread.
This one I tried to monoprint but didn’t like the results. Then I used an orange crayon to do a rubbing on a texture plate. Then I added some of the inside circles from the cut out delta symbols and then free motion embroidered over the top.

This is a closeup.
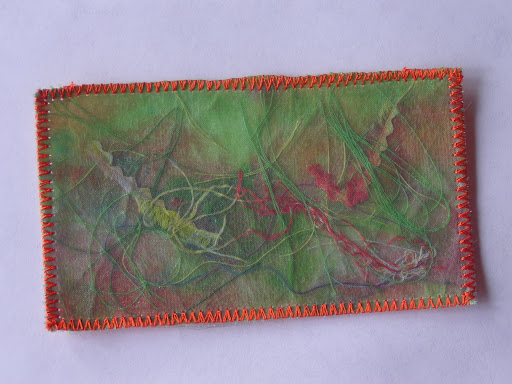
This one I added threads and scrap pieces of fabric and then covered with green organza.

This one is free motion embroidered in green.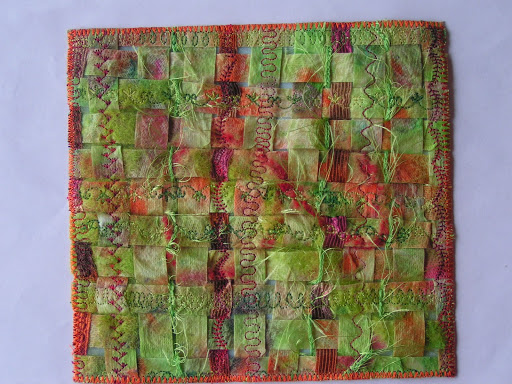
This was two pieces. The first piece I embellished with yarns and wool from the back but I didn’t really like it. So I cut it into strips and weaved with another piece that was cut into strips. I added some yarns and ribbon tape in the weaving. I then fused to green organza and used the automatic pattern on the machine to sew some of the strips.
Here’s a close up.
This one is embellished with silk cocoons and eyelash yarn.
This one is embellished with green and orange wool.
This one is hand stitched.
Here’s a close up.

Now to decide which layout I like. I’m going to put the all back together and attach. I haven’t decided about backing yet. Here’s one layout.
Here’s another layout. The size of this piece is going to end up being 12-15″ by 15-18″ depending on the layout.

I kind of like this layout with the holes in between. Which do you think works best? I’m sure I’ll move them around many more times before I decide.
