Tree Page from Cobi

 Look at all the wonderful things that I received from Cobi in the Netherlands yesterday!

 Here’s my tree page. She made the tree with puff paint.

 Here’s a close up of the texture in the puff paint which is wonderful. I love the colors she chose.

Here’s the back – she’s called the page “Summer is Over” after a song that she wrote out for me in the top photo. Thanks so much Cobi!

What I’ve Been Up to This Weekend

 On Friday, my local fiber group met at my house. We talked about line and did an exploratory marks exercise. Using a variety of objects, we used walnut ink to make various lines. The point was to try and make as many different kinds of line as possible.

 This is the box of “tools” that we used to make our lines.

 Here’s the group busy nuno felting with their sanders. None of them had nuno felted before so I was kept busy helping out. I didn’t make anything but they all made scarves. Sadly, I didn’t manage to get any other photos. But a good time was had by all.

 Here are some cards that I made with the marbled paper that I made last month.

I think I’ll add some more to these but I had them cut to the right size so I glued them on to the cards.

 And a few more.

 This is the other thing I’ve been doing. Stocking up on cat toys. Need to have them ready for all those Christmas shoppers.

 All nice and fuzzy in bright colors!

I made a flat piece of felt and added silk noil on the top. I’m going to be making Christmas ornaments and presents out of this so more on this later. It was really hard to get a decent photo and this one is still pretty blurry. Hope you all had a nice weekend!

Design Focus Friday – Line

The first element of design that we’re going to play with is line. There are many different types of line – horizontal, vertical, diagonal, dotted, jagged, thick, thin, wavy, straight, long, short – the list could go on indefinitely. How many different types of line can you find? Take photos of as many of the lines as you can that you see during your day. Now go through the photos. Which of the lines do you like better and why? How can you use these lines in your work? How can you use them to organize? Texturize? Guide the eye? Provide movement?

Be aware of what the shape of lines can convey. Sharp edges could indicate tension, crispness, hardness, formality, or high tech. Soft edges and curves may be softer, flowing, more casual, or more personal. Even small changes in line thickness, endings, or shape changes can alter the look and feel of a design. Try drawing sets of patterns using only black or white lines that illustrate static, dynamic, or random line patterns. Experiment with line width, spacing, and using horizontal, vertical, curved, and even diagonal lines.

How can you use line in a composition to make it more active? Or still? What direction of line conveys more action? Or serenity? What emotions can you evoke with line alone? What does changing the weight of the line do to your composition? Or changing the texture of the line?

Try thinking about and using line in your work this month. I’d love to see what you come up with so do leave a comment. I’ll post a link to show everyone else what you’ve created.

Window for Elizabeth

 Here’s the page that I made for October. The theme is windows for Elizabeth. This is based on the stained glass windows at the Presbytarian Church in Whitefish. I painted two pieces of lutradur. I used one piece as the background and then cut the other piece up into small pieces. I then free motion stitched all the pieces down on to the background and applied commercial felt around the windows.

 This is the back. I had to put a piece of paper on the back because I didn’t get the front and back lined up well the first time around.

And  here it is in the sunshine so you can see that it is translucent. I wanted to  make it look like a real window and I’m pleased with how it turned out.

What I’ve been Dyeing

 I spent all day on Friday with my dyes. These are the first of the lace weight wools that I’ve dyed. I will be doing a lot more of these. It was very easy. The part that took the longest was making the little skeins and tying them so they wouldn’t tangle. These are going to be perfect for adding hand embroidered accents to felt.

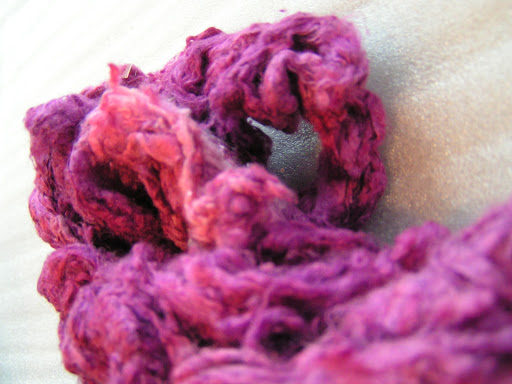
 This is silk noil. I had several other colors that I dyed but it was hard to get a decent photo. I’ll be adding these to my felt projects as well. It will add lovely texture and a bit of shine.

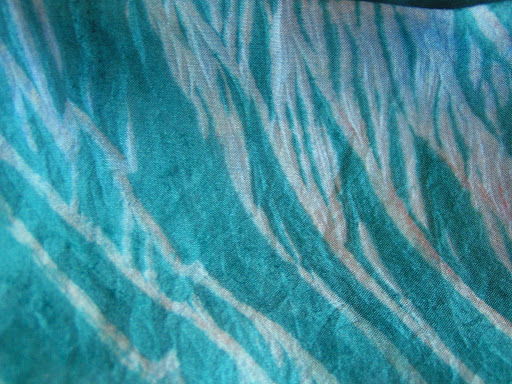
Here’s the first nuno felted scarf that I made last week. My favorite fall colors.

 Here’s the back side. I love the texture of the silk. Isn’t it yummy?

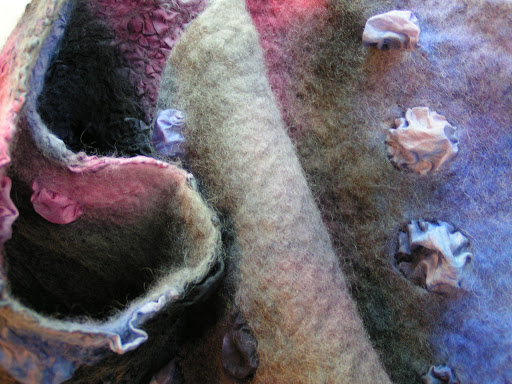
Here’s the second nuno felted scarf. I am very disappointed in this one. I put way too much black and it looks awful to me. Hopefully, someone else will like it.

I do like the little circles of unfelted silk. I will do more of those but just dye differently or use already dyed wool for the next one.

 This is one of the scarves that I dyed quite a while ago and took to the store to sell. It was a light blue with small spots of pink. I didn’t like it and I was tired of looking at it that way. So I over dyed and it looks much better.

 Here is one of the marbled scarves I made with our group at the first of the month. I over dyed it and again, in my favorite fall colors.

 This one didn’t work out as well. I over dyed these by soaking them in vinegar, letting them dry and then painting the dye on the back side. I used a watered down blue and it dyed very unevenly. The gold one above worked just fine with the same technique.

 And this is the last one. I dyed it a pale lavender. It still isn’t something I would wear but perhaps someone else will like that much pink.

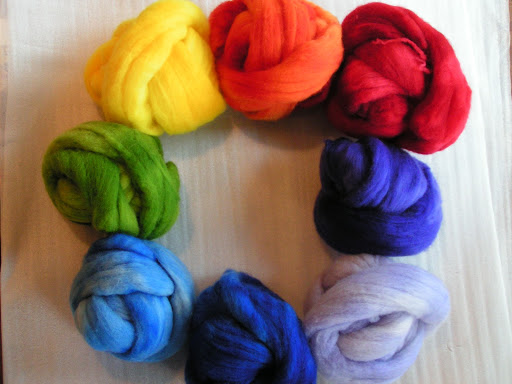
And then I needed more wool for making cat toys. So here is a rainbow of wool. You can’t really see the difference between the purple one and the blue but there is a difference. Just poor lighting. I also dyed wool for a purple and green vase that I will make for my sister for Christmas but the photo didn’t turn out well. It was a busy day but now I’m ready to get working on a lot of projects. Happy Halloween!