Day of Discharging

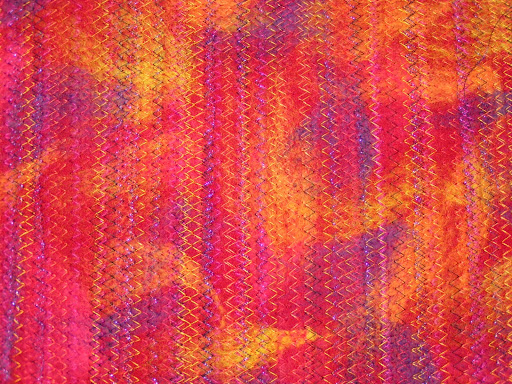
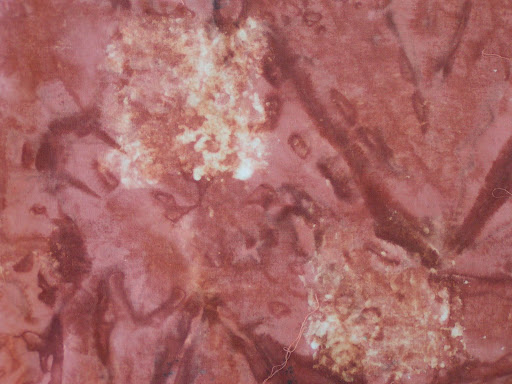
I’ve started a new group locally in which we’re going to meet every first Friday of the month and work on different surface design techniques. There will be 3-5 of us. This first time, we had three and we had a blast. We worked on discharging with various bleach products. I have done this before but not much. The piece above is a hand dyed fabric that I then stenciled some Soft Scrub through a square stencil. I did four squares but didn’t get enough bleach in two of them.

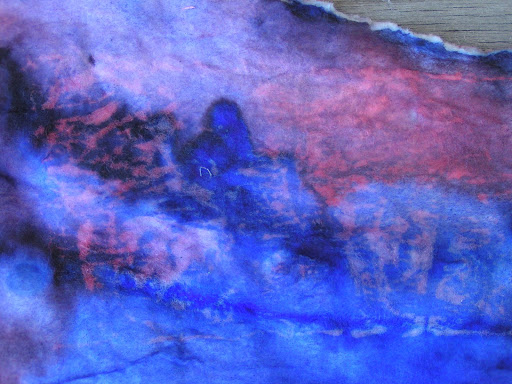
This is a piece of rusted cotton fabric that I had dyed with black acid dye (old) and it turned a grayish blue. So I shibori wrapped it and stuck it in a bleach solution.

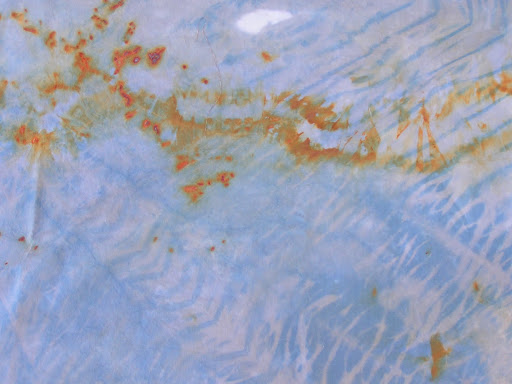
Here’s another view. We decided it looked like the Gulf oil spill. Not sure what I’ll do with this piece but it turned out better than expected.

Next, I started playing with some old t-shirts. I used several of my bark stamps and then sponged on more Soft Scrub. The sponged parts didn’t all get enough bleach so I may add some more to this later.

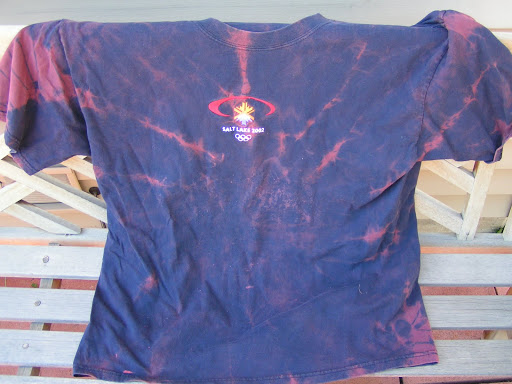
Hubby gave me this blue t-shirt from the Salt Lake City Olympics and the first time I wore it, I washed the bathtub and bleached out the middle section under the embroidered logo. So it has been sitting in the closet for years. So I tied it up and threw it in threw it in the bleach solution. We didn’t have enough bleach for it to penetrate well. But it always surprises me that blue discharges to red.

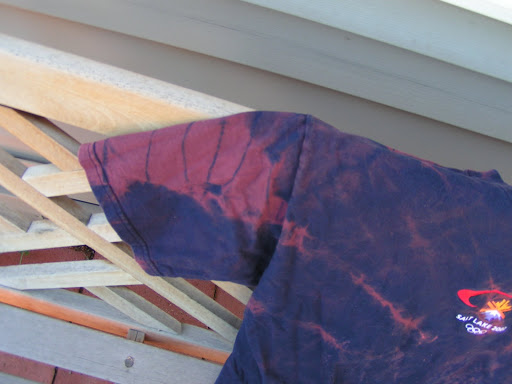
This sleeve is my favorite part.

Here’s the back – I actually like the back better than the front. I may do some more discharge on this as well and I will probably cover up the logo on the front.

This was an experiment. I had some polyester batting that I had painted with inks. I then took a brayer with Soft Scrub and brayered across it. I like the patterning I got. I did rinse this and put it in bleach stop agent and it lost a lot of it’s color from the inks. But still interesting experiment.

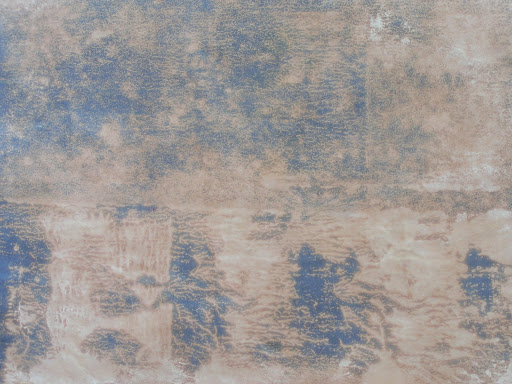
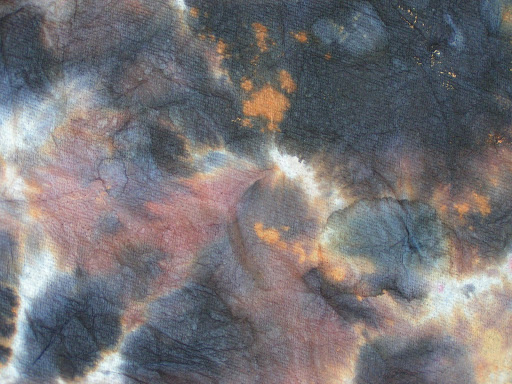
Then I started bleaching some papers that I had previously painted with acid dyes. I hate to throw away my dyes and they don’t keep very well so I paint on paper with them. I rolled the Soft Scrub on with the brayer again. Isn’t it cool?

This is the back of the paper above. Look at that rusty orange – amazing color differences from front to back.

This is a paper towel with acid dyes and then sponged on bleach.

And the back. I am planning on doing some further experimenting with these papers. I may do some stitching with them and play around with different ideas in my studio journal.

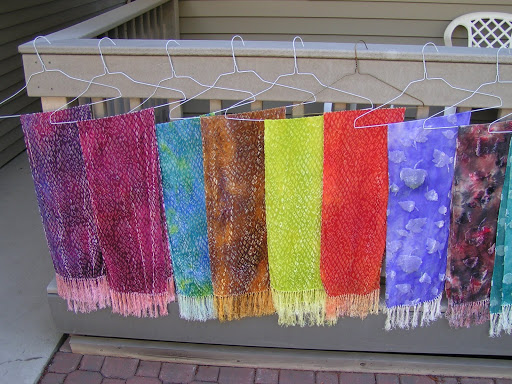
I am really excited about the new group. The two people who are in it so far are both wonderful fiber artists. I took a piece that I have been working on for ages and got a wonderful idea on how to finish it. I haven’t ever shown this piece on the blog because I thought I might enter it into a show. Now that I have an idea for finishing it, it’s much more likely to happen instead of just languishing around the house. Next month, we are going to marble scarves. I’ve never done marbling before and I’m really looking forward to it. Hope you all have a wonderful week!

September already??

Chris received her Coastline page so here it is. It’s needle felted on a recycle sweater and then a bit of hand stitching on the rocks. If you click on the link to the Traveling Pages blog you can see more about it.

Here are the barrettes that I finished yesterday while driving to Missoula and back for the Griz game. We won 73 to 2. Plus we had thunder and lightening, weather delay and then it was roasting hot. Weather in Montana…

Another view – now we’ll see how they sell.

I also worked on making cat toys. These are after they’ve been in the washing machine. Now to take them out of the stockings and they’re ready to go.

I made four more birthday cards so I’ll have them when I need them.

And I printed the ones that I talked about last time I posted. This is based on the Open Range license plate sold here in Montana. I like how these turned out and I’m sure I’ll print more. But I also want to print them on fabric. So I’m sure you’ll see these again.

I can’t believe it is already September. I haven’t talked much about my goals that I set for this year. I have not been able to follow through as I would have liked. My back is still causing problems and I won’t be able to take the level II Machine Embroidery course that I wanted to do. However, they are going to start offering online courses so perhaps I can take it that way. I just can’t afford to take the time off and the travel expenses are soooo expensive. So I will re-evaluate at the end of the year and see what direction I want to take. I have been concentrating a bit more about making things that will sell. I may work on getting representation in more galleries and perhaps consider selling online with Etsy or something similar. Lots to consider but more on that later. Hope all of you in the US have a good Labor Day and everyone else have a great week!

Greeting Cards, Barrettes and Studio Journal

In the most recent issue of Cloth, Paper, Scissors there was a workshop article entitled “Faux Silkscreen” by Patricia Gaignat. It uses sticky back craft foam sheets to make stamps. I have used craft foam sheets to make stamps for a long while but I never thought of using them this way. I needed a card for hubby’s birthday so I thought I’d give it a try.

First I made a sketch of the card. Her hint to draw the focal point first and then add background elements worked well. You do have to remember to reverse your text if you are adding those as details. But if you are cutting out letters as part of the stamps, you don’t have to reverse them with her technique.

You transfer your design to the back of the sticky back foam (the paper side). Cut out the elements and then stick them to acetate or transparency sheets. I really liked how these stamps worked as you can see exactly where to align them when stamping, they are thin and flexible and work really well.

So I am trying out a landscape design with the same technique. I think I will stamp these on fabric and then add thread sketching and then sew it to a card.

Here I’ve transferred the design to the back of the craft foam. I haven’t cut this one out yet. I’ll show the results once I’ve completed a few cards. And hubby did like his birthday card.

Here’s the first barrette that I made from the drizzled felt of my last post.

I used a commercial fabric for the backing and hand stitched the barrette clasp on.

I like how this one came out so 11 more to go. I’ll be selling these at the store. Hopefully, they’ll be popular.

I have been doing a little work in my studio journal. These are shapes based on piece of bark from a ponderosa pine. I picked a bunch of these up off the ground on our small trip in June. They remind me of puzzle pieces.

Here I took one of my favorite shapes and made a pattern. I also have made some foam stamps of several shapes but forgot to take photos of those. I am planning on making several more and then will do some trial printing in my journal.

I can’t believe it is the end of August already. Football season starts next weekend. So we’ll be off to cheer on the UM Grizzlies. We have a new coach so hopefully, we’ll still have a good team and a winning season. Go Griz!

Drizzling

Here’s what I’ve been working on lately. It’s a piece of recycled wool skirt which I machine needle felted with various colors of wool. Then I drizzle stitched it in a the same colors of thread. I have a bit more drizzling to do and then I’ll make it into barrettes and brooches. I’ll show you the completed ones when I’m finished.

The other piece I completed is this ‘Coastline’ page for Chris. I mailed it off to her yesterday so I’ll show you the full page when she gets it.

Hope you all had a good weekend!

New scarves and the Seashore Page for Juliette

Here is what I did most of the day on Friday. Dyed 24 rayon/silk cut velvet scarves. There are 6 of each design and since I used acid dyes, they were lighter than if the scarves were pure silk. But they came out better than I expected and they’ll all be in the shop on Monday to start selling.

Here’s more – mainly the leaf pattern. The ones above are diamond pattern.

These are the abstract pattern.

And this last set is floral. I wish I knew how to put all the photos together to make a panoramic shot for you. That brings up the subject of my using Photoshop. I tried for nearly two hours Friday morning to layer two photos together. I just can’t seem to make it work. I read all the help instructions and tried to do what it said but no go. So if anyone knows how to do that and can explain it easily, I would love to be able to layer two photos together.

Juliette received this page so I can show you my second seashore page. I’ve always loved sandpipers when I go to the beach so that’s what this is based on. The sand is from a rusted piece of fabric, the water is hand dyed and I drew the bird with watercolor pencils and then painted with fabric medium. A bit of machine stitching and quilting to finish. The edge is done with a raffia machined cord.

Here’s closer view of the sandpiper.

And here’s the back. I am way behind my usual schedule for my August page. I usually have the page done already and I haven’t even started. The photos I was trying to layer on Friday with Photoshop were to be the basis for the page but I never got it completed. Sigh… I’ll have to do some other technique and get started soon. I don’t want to get behind. Chris, your coastline page will be started soon, I promise!