DDF – Day 23

I finished my shadow applique piece today that I started yesterday except for the edges/finishing. I need an iron for that and I don’t have one handy here at work for some reason. I also continued to work on the design for my folk design inspired applique. I am basing this design on Kyrgyzstan carpets or shyrdak.

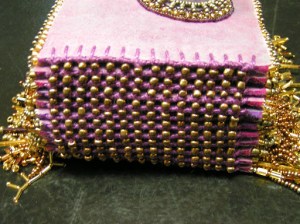
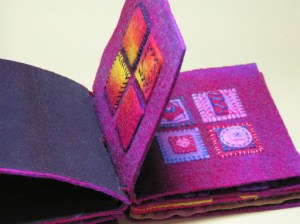
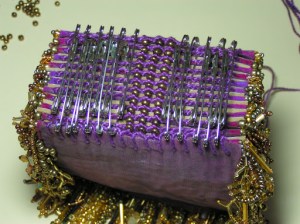
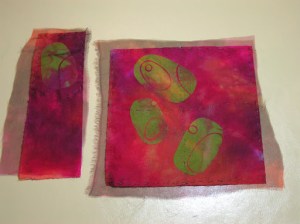
Here is the finished applique. You can just barely see the silk organza sticking out around the edges. I need to fold that over and fuse it to the back and then stitch around the edge. I think I will stitch the edge in a reddish brown so that it doesn’t show much. I don’t think I want to stitch it in green.

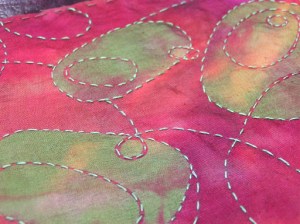
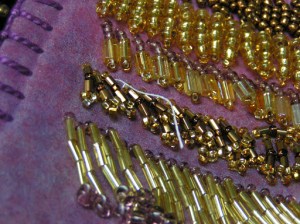
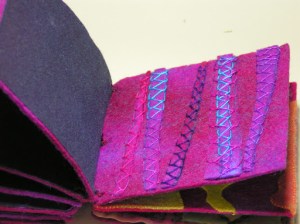
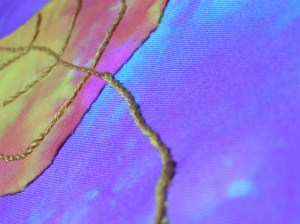
 Here’s a close up. I drew the stitching lines on with pencil so I had something to follow.

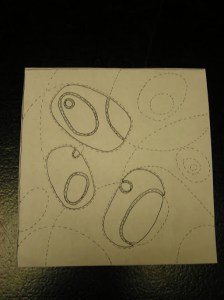
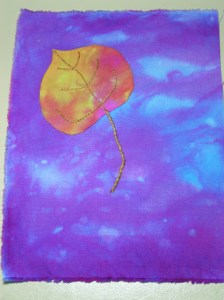
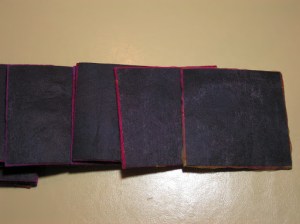
 Here is one of the designs that I am considering for my next applique piece. I am going to make this from hand made felt so actual felt making is going to occur amazingly enough. I laid out some blue wool today. Perhaps I’ll get it felted tonight. I already have a piece of red prefelt so I’ll use that as well.

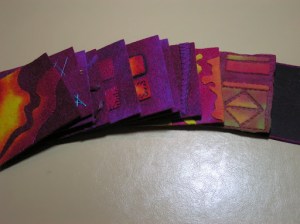
 Here are four other design possibilities. These are all based on “ram’s horns” and from photos I found online of various shyrdak. I cut the patterns out from paper and glued them down in my journal. There are endless variations. I think I might just do one of the emblems instead of four connecting ones on a four inch square of felt. But perhaps I’ll go for it and do all four squares.

 The Kyrgyz use a lot of negative and positive space/shapes in their work. They usually cut out the pattern in two different colors and use both the positive shapes and the backgrounds to create intricate designs. Which design do you like? I haven’t decided but I know it won’t be the bottom left one as it is way too intricate to try and cut out of hand made felt. It will most likely be one of the simpler shapes.

DDF – Day 22

Today I am back to stitching my applique homework, specifically a shadow applique sample from cotton fabric and an overlay of silk organza.

 Here is my sample piece that I tried out a variety of colors of threads to see which I liked the best. I did not used to do this but I find it really does help in choosing the right color of thread. I tried a dark reddish brown, burnt orange, pink and green. I never even considered the green but after I tried the first three and none of them did much for me, I decided to try green. And I really liked it. It makes the stitching stand out against the background. (click on the photo to see the different thread choices more closely)

 Here is the entire design and I’ve got about a quarter of it stitched. It is really hard to show the true colors because the silk organza disappears under the camera. The piece is actually darker and the green “pod” shapes are not as bright.

Here is the stitching design that I’m using. I made 8 different designs and chose the one I liked best.

DDF – Day 21

This makes three weeks of A Daily Dose of Fiber and I’ve managed to post every day about my fiber activities. So how long does it take to form a habit? I think it’s longer than 21 days but I’m moving in the right direction. The exciting news today is that I finished the binding on the bead book!

Here’s the binding. I added a bead between each knot. This made this edge more like all the other beaded edges and it also helped to give space between each page.

 I like how it turned out but I think I should have done one more row on each end that was 1/8 inch in from the edge. The other stitches are 1/4″ apart. The edges are really heavy and put strain on the binding. But it will have to do.

 Now comes the bad news. As I was doing the binding, beads started falling off. Oh Nooooooo….. One of the fringes on the last page came undone. You can see the pink end of the thread so that means the knot came undone and the fusing of the backing didn’t hold it either. Shoot.

I love how this binding lets the pages lay completely flat when the book is opened. It is well worth the effort to do because the pages turn so nicely.

And more shoddy workmanship! Another knot came untied and beads fell off of this fringe page. This is the original thread that I started with that I didn’t like. I had to replace some of it already and I guess I should have gone back and redone all the white thread. Where is quality control inspection when you need it??

DDF – Day 20

I’m still here stitching away. I finished another applique sample, got my applique book bound and started the binding on the bead book.

Here is the applique book bound with a stab and wrap binding. I really don’t like this method of binding. It was supposed to be easier than the other method that you’ll see at the bottom of this post. It might not have as much stitching but it just doesn’t look as nice, the book doesn’t open as well and it was difficult to get the tension right.

 Here you can see that the pages don’t open up all the way.

 The chain band stitch binding on the bead book allows the pages to lie flat. You can see that this binding is tighter. Perhaps because I didn’t get the tension right.

 But the book is together and finished. Another item off my list.

 This is the next applique sample. Turned edge applique done with a piece of fusible interfacing.

 Here is is completed. I was able to get this one to lie much flatter than the last technique I used with needleturn applique.

 Here you can see that the applique is much more flat against the background fabric.

 The only problem was I cut too close to the edge and get little frayed bits sticking out. Oh well. It’s finished!

Here I’ve started on the bead book binding. Three rows in the center are finished. I’m adding beads between each stitch. Since the pages are so “thick” with beads, I thought having a bead spacer would help in the binding to give more space. Plus it adds to the whole “over beaded” aspect of this book.

DDF – Day 19

Today I didn’t get much done but did finish up one applique project, basted another and got the backs attached for the applique book.

 This is the basting I got done today. I basted the organza to the background with the cut out designs. I also made a small sample so I could try some different colors of thread.

Here’s the finished applique piece. Somehow the photo is upside down. But I guess it actually could go either way.
What I did today was stitch the organza down to the back side. The stitching from the front makes a nice black on black look doesn’t it? Kind of quilted.

 Here is the applique book backs. I used painted fabric stabilizer of a medium weight and then fused them on. I used a fusible that has a clear backing and I had a really hard time getting the backing off. I worked out a way to take it off easily. I used a piece of packing tape, stuck it to the clear backing and then pulled the backing off with the tape. It was impossible to find a free edge to pull off as you would do with a paper backing.

Here’s the front of the book pages. This book will be bound with the “stab and wrap” method. So now I’ve got two books ready to bind.