Cut Back Applique Homework

Here are the two pieces that I did for my first homework assignment, cut back applique.

These were inspired by the concrete walls next to the freeway in Everett, WA. I took photos of them when we were there in October. I thought they might make nice stencils. I have to say that I should have stuck with the stencil idea as these were a bit too complex for my skill level and this technique


Here’s a photo of the inspiration. I chose the colors to represent salmon. I’m not sure that the concrete wall fish are supposed to be salmon but it reminded me of our trip and visit to the salmon festival.

The sea weed portion was really a pain to cut out and a pain to zig zag the edges. And parts of the fish were not much better.

I sketched the design first in my studio journal and thought that the first one needed another to go with it. So foolishly, I went ahead and did a second sketch, ending up with two pieces which are 6″x 9″ to complete.

I’ve been working on these all week. I finished with four hours of zig zag stitching today. I’ve decided that I really don’t like doing cut back applique that much.

You can see in the close ups how I had a bit of trouble with the intricate design. So in the future, I hope to remember the KISS principal: Keep it simple, stupid!

More Stitch Samples


We arrived home safely from our trip to Virginia and Philadelphia. It was almost warm there. The first day we arrived it was 60 degrees which really felt like spring. I even saw some early daffodils. With at least 3 feet of snow still on top of my daffodils, I don’t think they are blooming any time soon. I visited with Vicki while I was in Virginia and she gave me some of her lovely hand dyed cotton fabrics. I have to say that they are truly scrumptious! Thanks Vicki!


This is the Valentine I made for hubby. The background is angelina that was ironed over a rubber stamp. The heart is made from mixed breed wool and wensleydale locks that I felted and then stitched. I used the drizzle stitch that I learned recently. You can’t see much of the stitching in this photo but there is another sample below.


Here is the felt with drizzle stitch.


And a close up. I used stitch and tear on the back to prevent distortion and it is quite flat.

I worked today on more samples for my homework for my experimental machine stitch class. These are all of samples that we did in class that I wasn’t too happy with the first try. This is using an automatic stitch and varying the width and length of the stitch to get different looks of the stitch. I used cotton muslin with an iron on stabilizer. It didn’t stabilize much. I got lots of distortion of the fabric.

Here’s a close up. I actually liked the way this stitch turned out as it doesn’t look like most of the automatic stitches that are available on my machine. It is much more organic looking.

This is cable stitch using an automatic stitch. This is the same stitch that I used on the green piece above.

Here’s a close up. I am really happy with being able to change my bobbin tension as this is so much better that what I was able to do in class.

Here is cable stitch again only using it free motion. On all the cable stitch samples, I used some of the hand dyed threads that Sharon sent me when I guessed correctly how long her sampler was. It works really great in the bobbin. This is design I am practicing as I have some ideas to take it further. But since this is just supposed to be a cable stitch sampler, I didn’t add any other stitching. I want to try filling in the amoebic like shapes with either granite stitch or mossing.


Here’s a close up. I used a variegated thread in the bobbin and for the top thread. I’ve got three more home work pieces to complete and then I’m going to start experimenting with the stitches I have learned on felt. More to come!

Fiber Exchange and Level I Experimental Machine Stitch


The felting forum had a fiber exchange and so I sent off a “baggie” of various fibers. This is what I got from Jessica in return. Not exactly a baggie is it? But all wonderful fibers and lots that I haven’t tried, so I’ll have to experiment. Thanks Jessica!


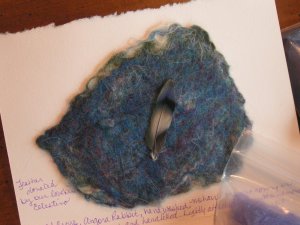
She also sent me this little felted piece with one of her bird’s feathers. Beautiful colors!


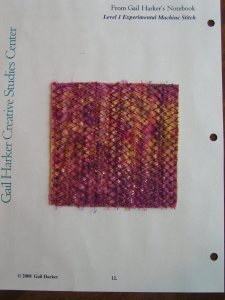
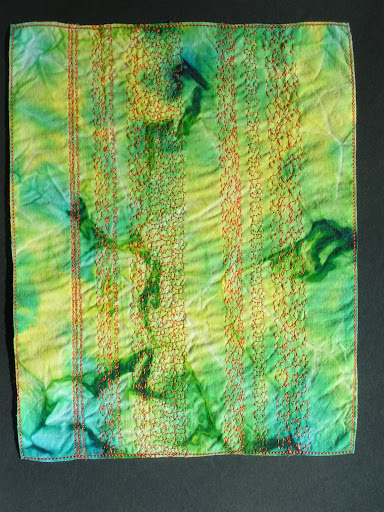
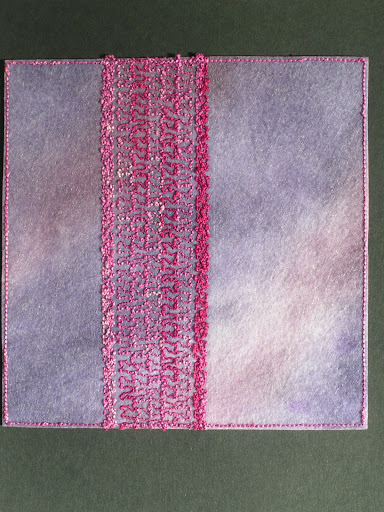
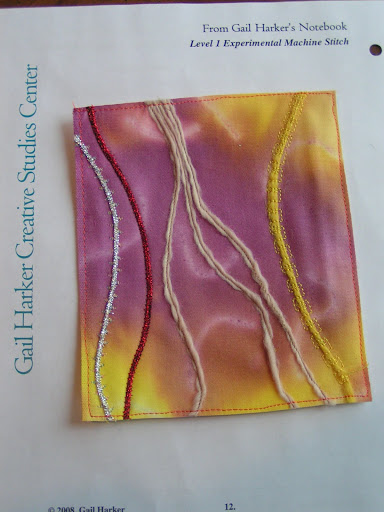
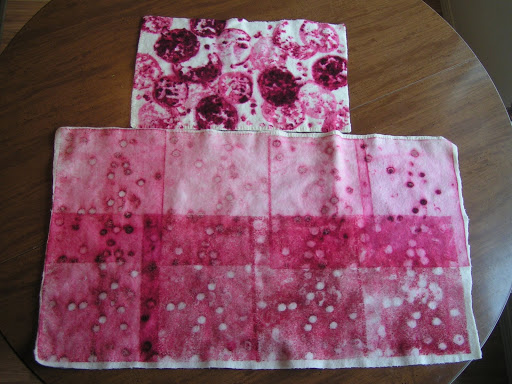
These are all my samples from the class I took. It was wonderful, we went over all the basics (most of which I needed) and I learned a lot about different threads, needles etc. which will be a big help since I just was guessing before. The first day we painted all of our fabrics with Dye-na-Flow paints and then we started stitching. The sample above is drizzling stitch.


This sample is automatic zig zag and satin stitches.


This is working on getting a perfect satin stitch.


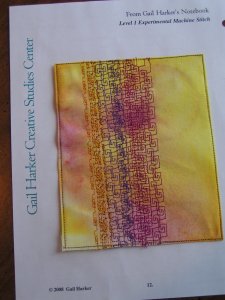
This is taking an automatic stitch and changing the stitch length and width to make patterns.
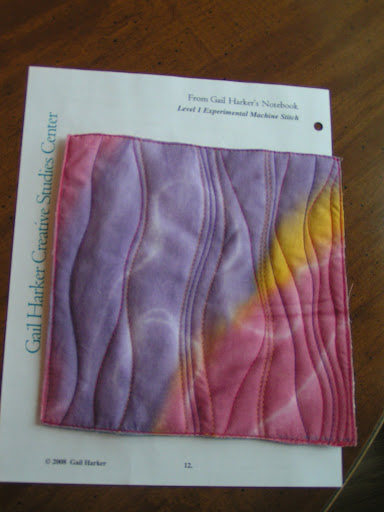

Quilting


Quilting with applique
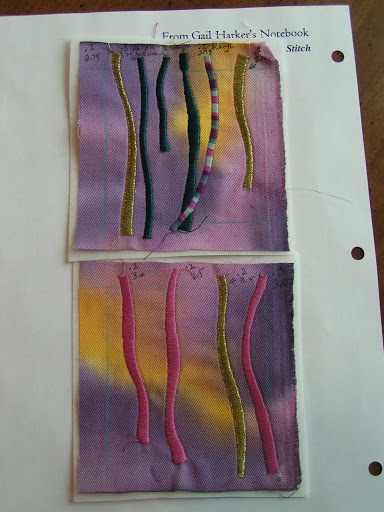

Couching


Free running stitch


Free zig zag stitch

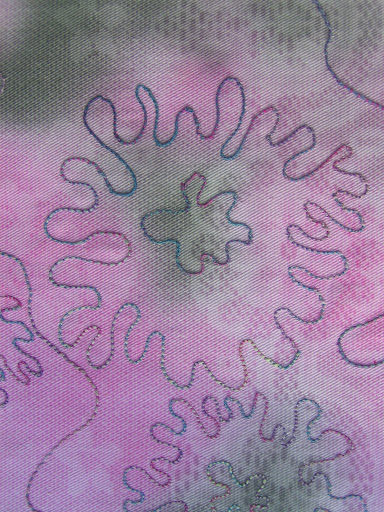
Free running stitch using a hoop


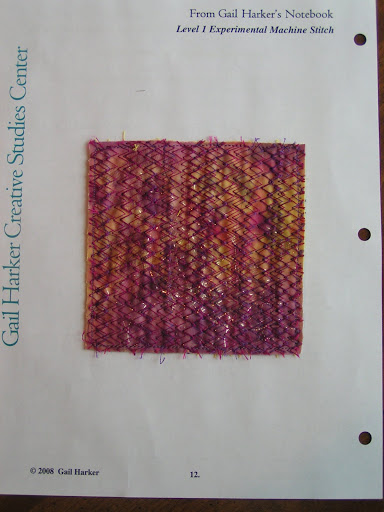
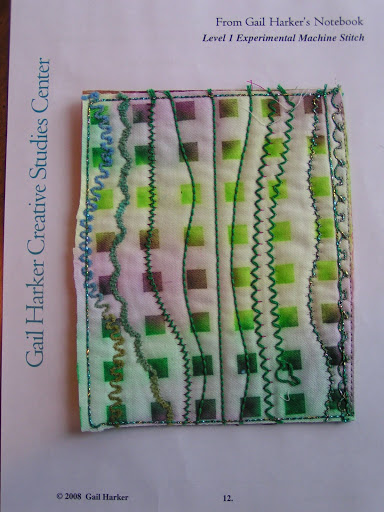
Continuous stitch on a grid


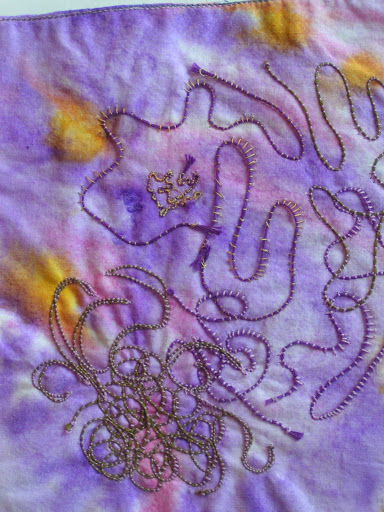
Automatic cable stitch – I had a bit of a problem with this as my bobbin case for my machine had been sabotaged at the factory. Brother decided that it didn’t think people should be able to change their bobbin tension so they put plastic stuff over the screw on the bobbin case. I couldn’t get it off while at the class. But since I got home, I scraped it all off with a scalpel and now I can change my bobbin tension.


Free cable stitch (without changing bobbin tension)
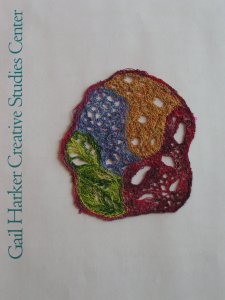
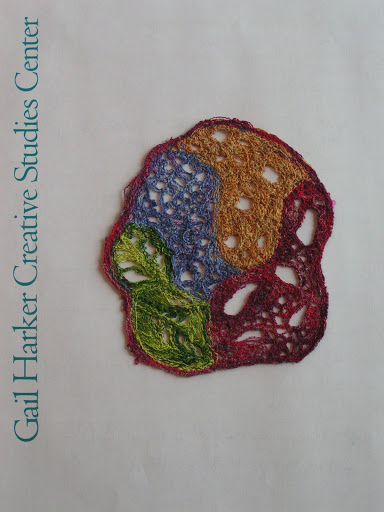

Free machine lace

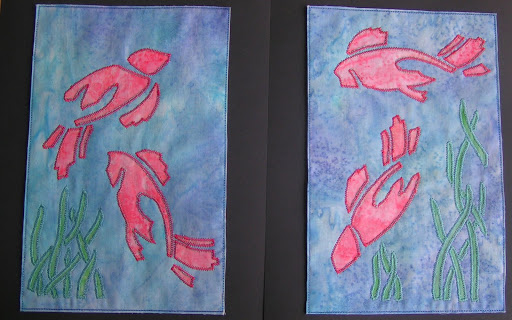
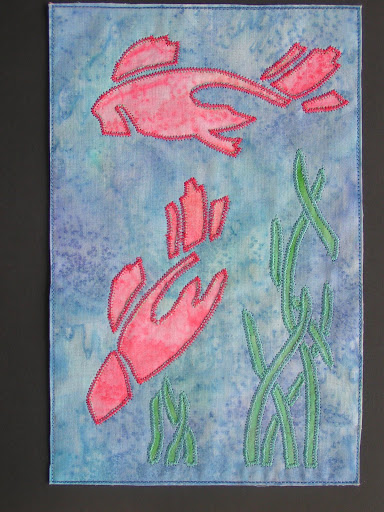
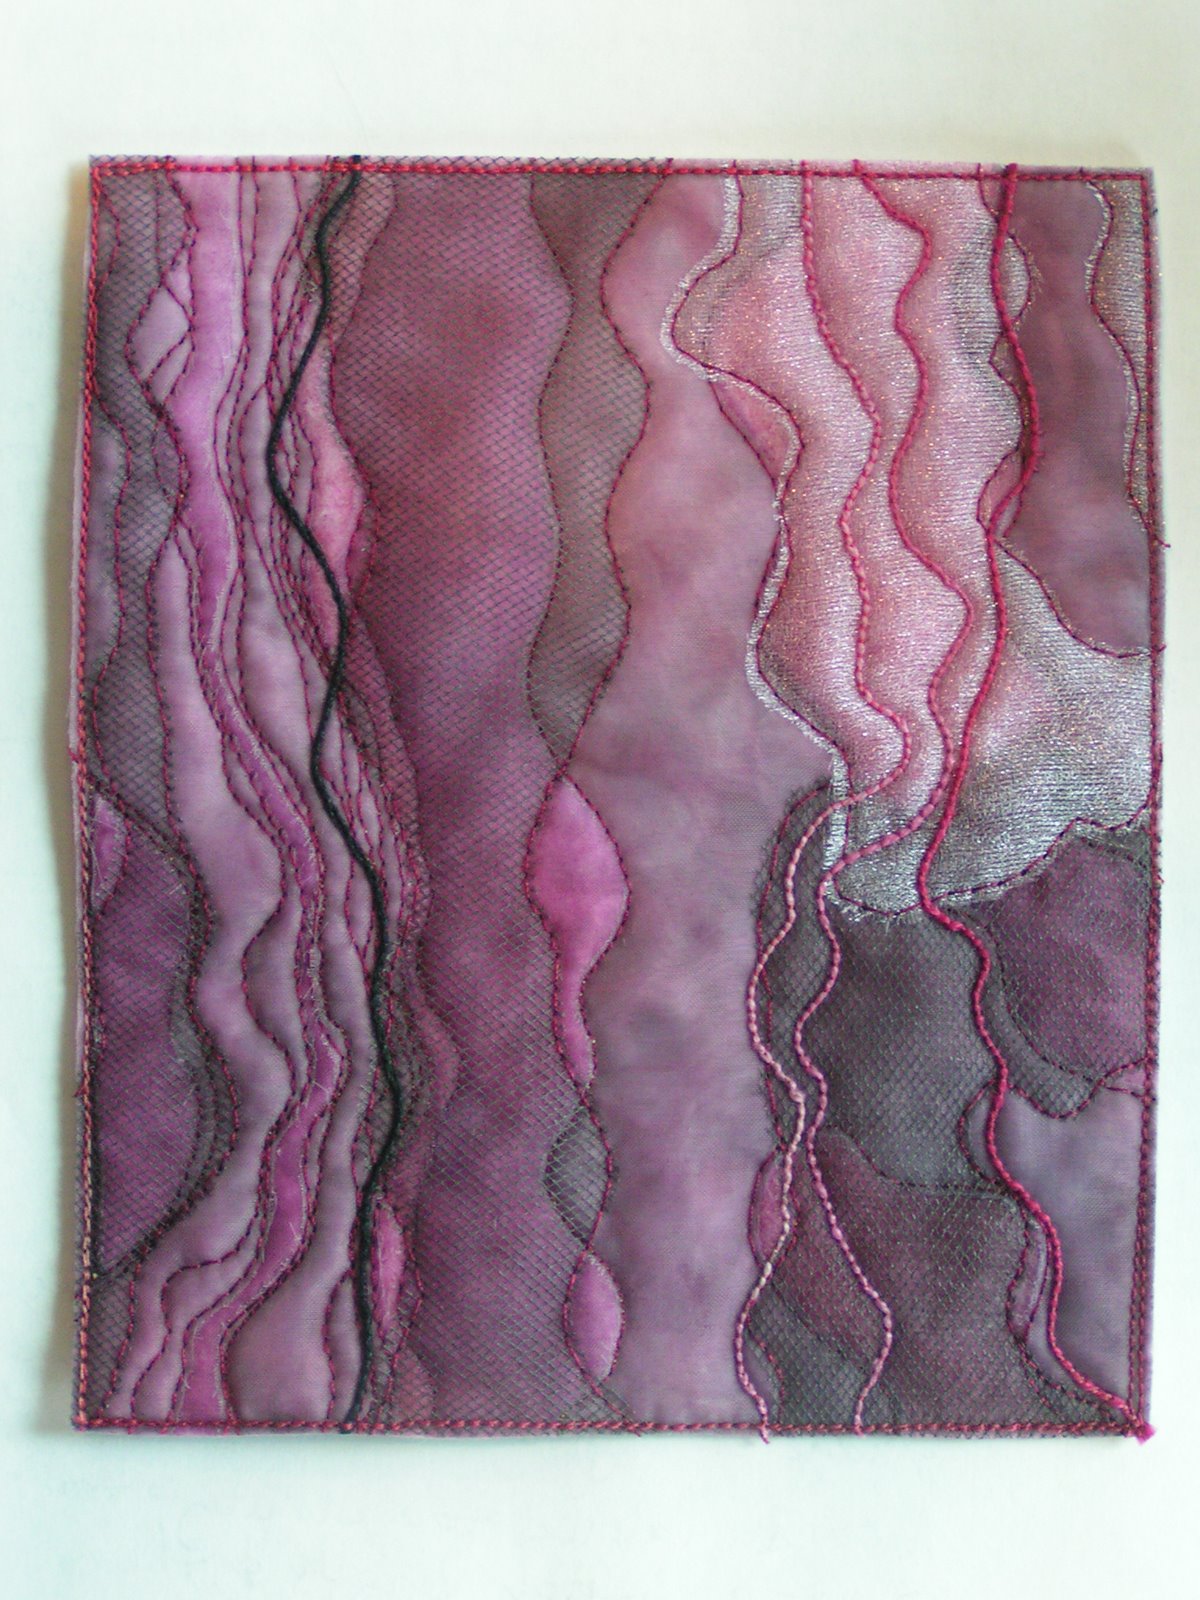
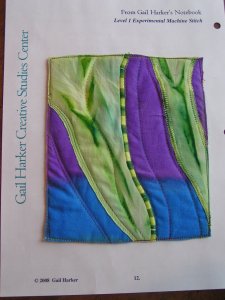
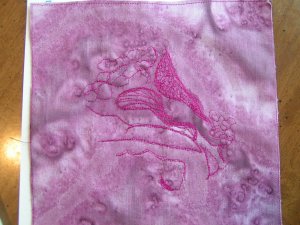
This piece I did today. It was part of the course but we didn’t have time to complete it while we were there. It is a combination of cut back and on lay applique with free running stitch and cable stitch.


Here’s a close up of the cable stitch. I am so happy I got it to work. Now just need to practice a bit.

Cut back applique sample – I didn’t have contrasting enough fabrics so I colored the darker ones in with a Sharpie.

I really enjoyed this class and so want to continue on to the Level II. That class lasts for a total of 18 months and you go back every 3 months or so and have 5 days of instruction with work at home in between. The next level II starts this March and there is no way with my work load that I can do it. But I am going to work towards doing it in another year to year and a half. These used to be City and Guilds classes but she has stopped getting the certification for these. But they are bases on the same concepts. The plan right now is to practice these techniques over the next three months and take them further into using my hand made felt for base as well as silk paper and other techniques. So you’ll be seeing more machine embroidery on future work. Stay tuned!

Wooooo Hoooo!

My “quilts” were accepted into the Salvaged Threads Exhibition! They will be in the Big Sky Quilt Retreat Show in Billings March 12-14 and then in Toucan Gallery (also in Billings) from March 25-April 25. The quilts will then be offered for sale on the Salvaged Threads blog until July. I still haven’t put a label on the back of these, so I’ve got to do that and then send them off.


I’ve been experimenting with acid dyes, wool and deconstructive screen printing. This screen (which I forgot to take a photo of) was made by using cut pieces of pomegranates. But I think the thickened dye was too thin. Instead of getting the pomegranate impressions, I just got dots of dye puddling on the screen. But it still turned out very cool. This is the wool before I steamed it.


Here’s a close up of the dots.


Here is it after steaming and the one on top is the one I showed you before with the pomegranates printed on. At least that piece looks like pomegranates. I’m still deciding about over dyeing these two.


Here’s a close up of the steamed piece.


I did more dyeing of wool including rainbow for my cat toys, used up the rest of the thickened dye on some merino that I might make into a bowl similar to my silk bowl of the last post. And these are some Wensleydale locks dyed with the exhaust from some nylon netting I dyed purple. These are nice and variegated and kind of remind me of wisteria. We’ll see what happens with these. I have lots of ideas for further vessels and bowls. Next weekend I am off to my Experimental Machine Embroidery class at the Gail Harker Creative Studies Center. I am really looking forward to that. So I probably won’t post until after I get back.

Sinful Sunday


Why Sinful? Well… This is kind of like Wordless Wednesday or Thoughts for Thursday. I got to stay home alone as I sent hubby off skiing again (I went yesterday) and I spent the whole day playing with fiber so it felt kind of sinful to be able to have 2 days this week to work on my projects. This lovely postcard came from Ilse yesterday. It fits in with the blue theme and looks like the snow we have outside. Thanks Ilse!


And this is my green postcard from Wendy, a bit late but nevertheless finally made it. Thanks Wendy!


I’ve started playing with printing and silk screening with thickened acid dyes on wool. These are pomegranates printed on to a wool blanket. I like how these turned out. Now to decide if I want to over dye, put more layers or use as is.


Here’s a close up. I also used these same pomegranates to start a deconstructed silk screen. I think my dye was a bit runny because it doesn’t seem to have worked like the book explained. The screen is drying now so I’ll have more experiments next week.


This is one of the silk fabric bowls I am making. The other is a surprise for later. This one I am going to donate to a local organization I am a part of for a silent auction. I am still deciding if it is finished or if I want to enhance the stitched lines more.


I didn’t do a tight satin stitch on the seams. And they therefore don’t stand out as much as on previous bowls that I made. But I kind of like the feel – it seems more organic this way.


And as it is supposed to suggest a flower. It is sitting on a circle of cardboard. Otherwise it tips over too easily. I am planning on embellishing the cardboard to match. I left all the endings of threads to hang loose from the edge. You can just see them here. Where oh where is my light box? I’ve got to make one soon.