Designing Lino Blocks

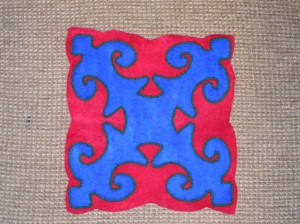
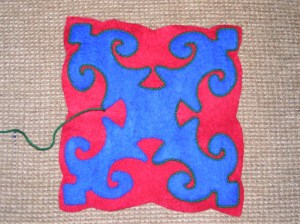
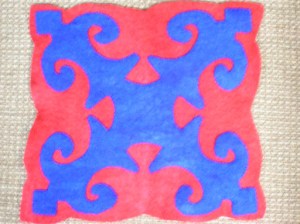
Our local fiber group is meeting next Friday and we’ll be carving Lino blocks. I haven’t ever done one before and it’s nice to try something new. Today I worked on a couple of designs for a 4″x 4″ block and a 2″ x 4″ block. I continued with the themes I have been using from Kyrgyz rugs. I am planning on making quite a bit of decoration for the yurt using these designs.

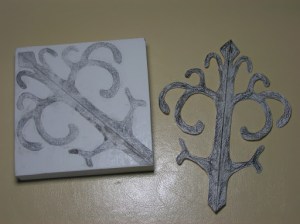
 Here is the 4″ x 4″ block. I cut out the design from paper and then covered one side with charcoal pencil and pressed that on the block to transfer the design.

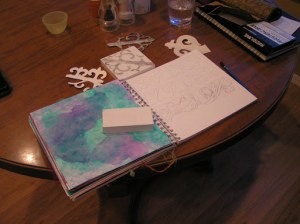
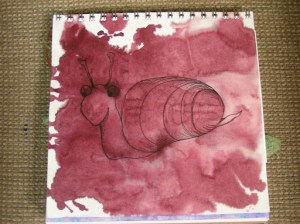
 Here’s the journal I’m working in. I’m trying out different designs for the borders.

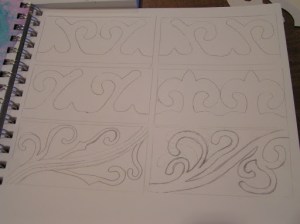
I am leaning toward the top right or the bottom right design. I think the one on the bottom is a bit too complex though. Especially since I haven’t carved one of these before.

Homework Complete

I finished all my homework for my stitch class! Whoopee! Today I cut out the painted felt from last week. We will be making machine stitched books with these pages. I also cut out some 50 weight Pellon interfacing for another book construction in our last class. Then since I was finished with my homework, I thought I’d play a little bit and make some cards with fabric collage.

 Here’s my ten pages of felt, they are 4 1/2 x 7 inches.

 This is the first card. I used some fabric that was rusted and then shibori dyed. The blue fabric is a batik that has been painted and sun printed.

 I am planning on adding hand stitching to these and then I’ll probably machine stitch the fabric to the card.

 The little bits of felt are some that I found in my felt scraps.

 I think that the felt is actually more of a prefelt but I can’t remember when or why I made this felt.

 It will be interesting to see how stitching will change the design.

I have no exact plans for the stitching at the moment. I plan on just going with the flow.

DDF – One Month

It’s been a month since I started the Daily Dose of Fiber challenge and besides the cut finger, it went very well. I’ve managed to post every day and get at least 5 minutes of something creative every day. I’m going to continue but I don’t think I’m going to keep track of the days for the full three months. Today, I finished the felt applique couching. I really like the result. I am sure that there will be more of these especially for decorating the inside of the yurt.

 Here’s the finished applique with the green yarn couched all the way around.

 And a closer photo.

 Then I did a little research on art in the late Bronze age. I am not very inspired by this era.

 Here’s a little more work in my sketchbook about the different symbols in the Kyrgyz rugs. These would all work for other felt applique pieces.

 Here’s more about the Bronze age. We have our local meeting next week so I needed to do my “art history” homework.

 Over at the Felting and Fiber studio, I wrote a post several weeks ago about drawing. I decided to try a little of the goofy animal drawing on to a previously painted piece of paper. You are supposed to find the shapes from the paint and then draw into them to make an animal. So here is my little snail Stanley.

He was fun to draw and just took a few minutes.

DDF – Day 30

I stopped this morning before work and bought some crochet yarn to couch around my felt applique. The only color that would work was dark green. Gold would have been nice but the store didn’t have any.

 I couched the yarn down with matching embroidery floss, using one strand.

I am almost 3/4 done. I think it would look really nice if I couched a thin gold cord next to the green but I’m not sure I’ll do that. It might be finished with just the green.

DDF – Day 29

I finished stitching my applique piece except for the cording I will couch around the applique. I don’t have any cording yet. I also finished beading my tassel for my bead book.

 Here’s the applique all stitched down. What color cording do you think I should use? Usually another color is used in the traditional Kyrzyg appliques. I was thinking maybe green?

Here’s the beaded tassel. The photo didn’t turn out too clearly. But you get the idea. I used a tubular brick stitch around the neck and then a horizontal netting below that followed by a standard fringe. Then I randomly stitched a few beads on the head of the tassel. This was very fiddly, took me 3 hours to finish and it’s only 4 inches long. If you don’t have much patience, I wouldn’t recommend making beaded tassels.